"Strings" project update

It's currently 54"x62" - getting to be a nice lap quilt size. Last week it felt like a baby quilt, so I'm making progress.
I worked this weekend on this project - my ongoing "strings" project.
This is what feels like my feeble effort to begin to tame those pesky strings/crumbs.
Strings aren't fast to work with but crumbs are even slower. I decided to make 3 quilts from my strings to start with and then I'll tackle some crumbs - giving them a couple of sewing sessions on Sat/Sun IF I have time. If something happens and I don't get to them, then it's okay - they'll wait.
I have to do it this way or I feel pressure from myself to work on them all the time and that just gives me feelings of frustration as it seems like I'll never finish!

I'm up to a 6x7 layout so far. (Goal is 10x10 though I may add one more row to make it 10x11 - it's a work in progress.)
I actually only need to make 27 more 6.5" blocks and I will have enough blocks to make this one to completion. This week I will get serious about making some more sashing strips as that is hindering me from adding some more of the blocks I've already made up. As it gets bigger, of course, it takes longer and longer to add even a couple of rows.
I only added one row to the bottom and one to the right edge for this update.
Before I could actually add rows to the top and sides, however, I needed to do some sewing to get the pieces needed. Here's what I finished up before I could even add those two rows:
First I made up some "strings fabric pieces". Three of them were rather large - one was smallish. No, I don't use a backing fabric - I just sew the strips together and press. I had quite a few larger, longer pieces here - mostly leftover backings - some charity quilts and some not.
I don't trim my strings into nice even pieces - I just use them as they are. If they are too wide, I might actually tear them in half to make them only half as wide. Often those things are weird things like the the hem of a second-hand article of something. I can cut along the fold line and tear in half and have 2 strings from that hem area.

You can see in the photo - upper left hand corner - I took the plunge and bought another one of those 30000 meters of white thread wonderful for bobbins. That cone of possibility cost about $10, by the way. It took a whole year to use one of these up the last time I bought one.
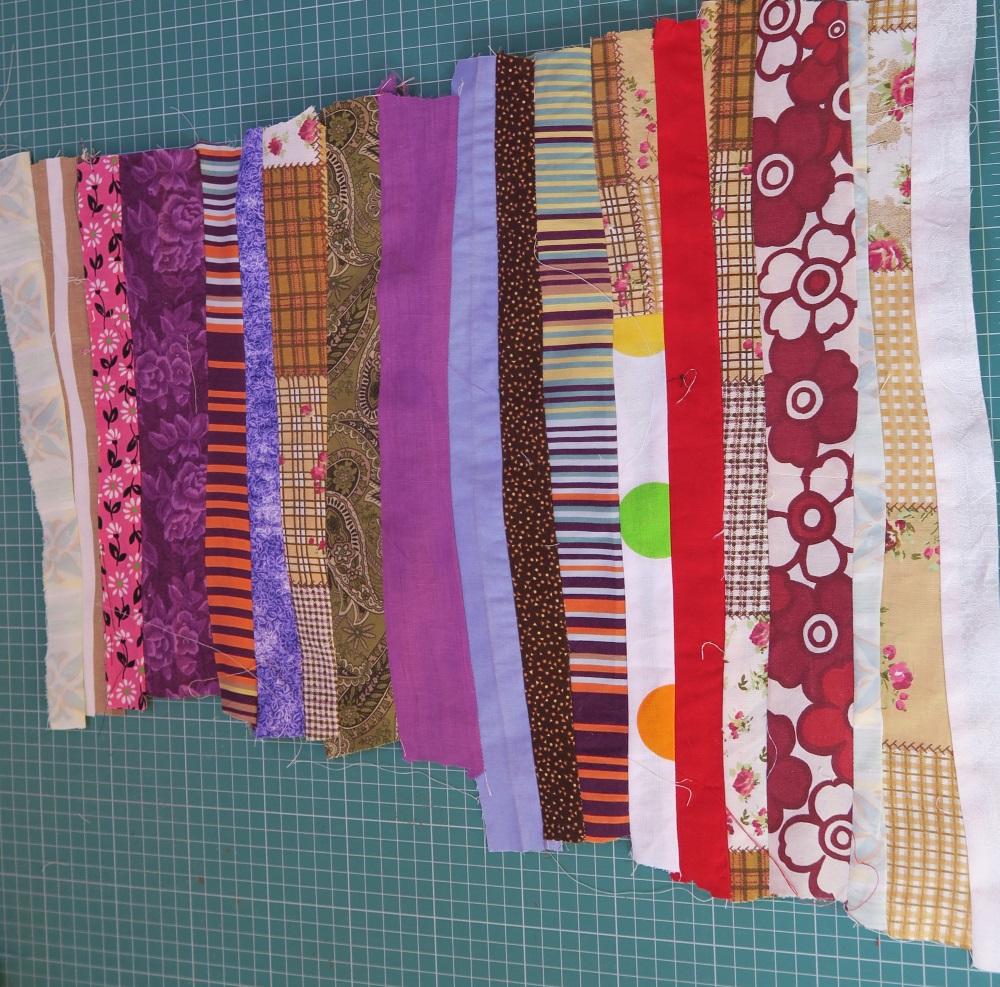

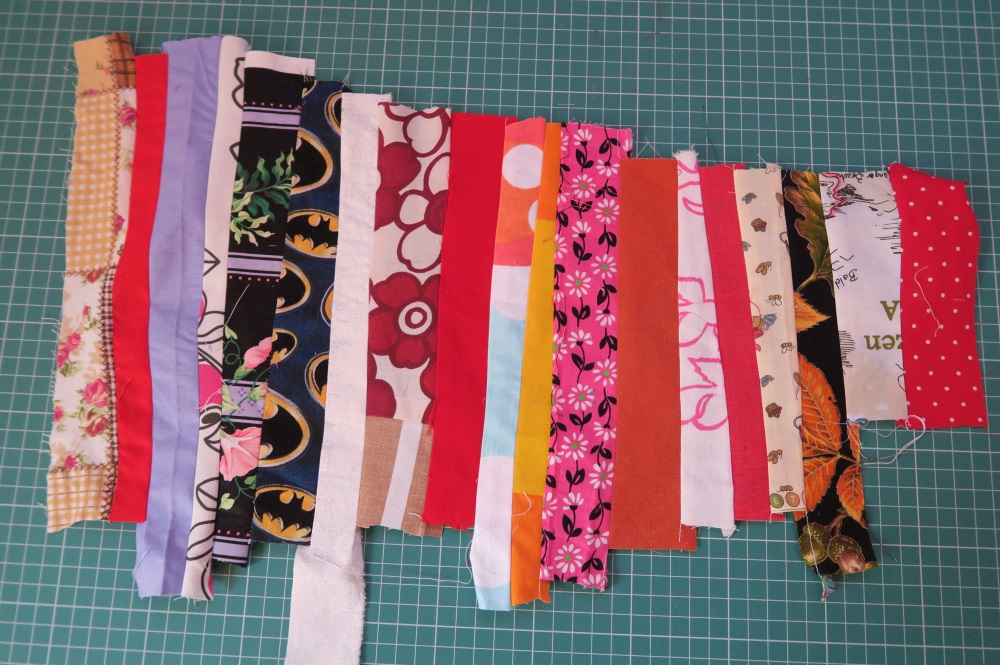
After I sewed my strings together, I trimmed them down into 6.5" and 3.5" squares.

(I also have scraps leftover from those - and I have an idea for inmprov blocks to try to use those up - or at least some of them.)
I found myself with 24 new 3.5" blocks and 23 6.5" ones. Of the 100 large ones I need, I have 73 - soo only 27 more of those larger 6.5" blocks are needed for this particular first ever string quilt of mine!
The small ones - the design I've got in mind - I still need quite a few, but I think they will be quick after making big ones. I also have some smaller strings that I will focus on using when I make the rest of the 3.5" blocks I need. I currently have 144 of the smaller ones but will need about twice that many, I think. That one is still brewing in my head and on EQ (Electric Quilt program)..
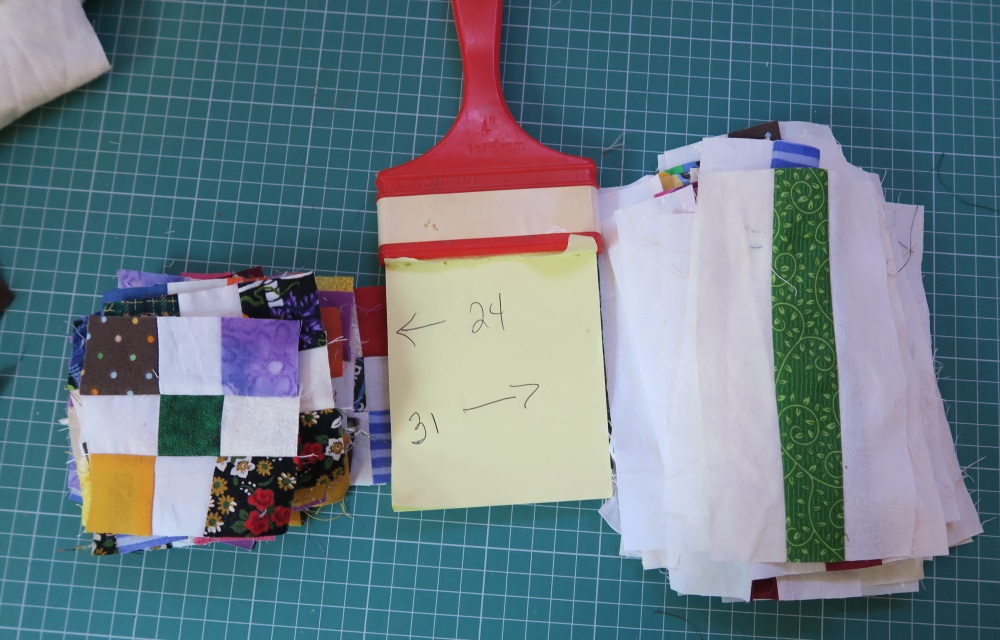
I also needed more 3.5" cornerstone 9 patches, so I dug around in my bags of 1.5" strips and found some more whites/off whites and saturated colors for those. I really should work on those sashing blocks earlier in the week - as I need lots of those - and I need a variety of colors to make sure I'm not repeating myself as I add to the quilt top. So, I had to make those. I made 24 small 9 patches and 31 sashing strips. However, if I had had even more made up already, I could have added even more rows to my top. Maybe next week.

My third project to be made from this current batch of strings will be something utilizing butterflies.
Some of you wanted to know how I made them - exactly.
Let me show you!
In order to get these butterflies, I used some of my strips fabric and my Big Shot Pro and a special butterfly die. Here's how:

This is the Big Shot Pro - a close up. I was so glad to find this on an online auction here in Poland - it had been a store display model.

It's pretty good sized - and heavy.

This is the die - I bought it from the Amazon UK. It's a very nice one!

When you take the die out of the package, you place it right side up.

Place your fabric over the die, making sure every part of the design is covered.

Cover the die and fabric with a plastic piece and turn the crank handle - I turn it just so it goes completely through and then turn the handle backwards and do it again - as this die has some small pieces and I wanted them cut well.

I got both of these butterflies out of that piece of fabric shown above going through the machine (I had to send it through 2x - one for each butterfly).
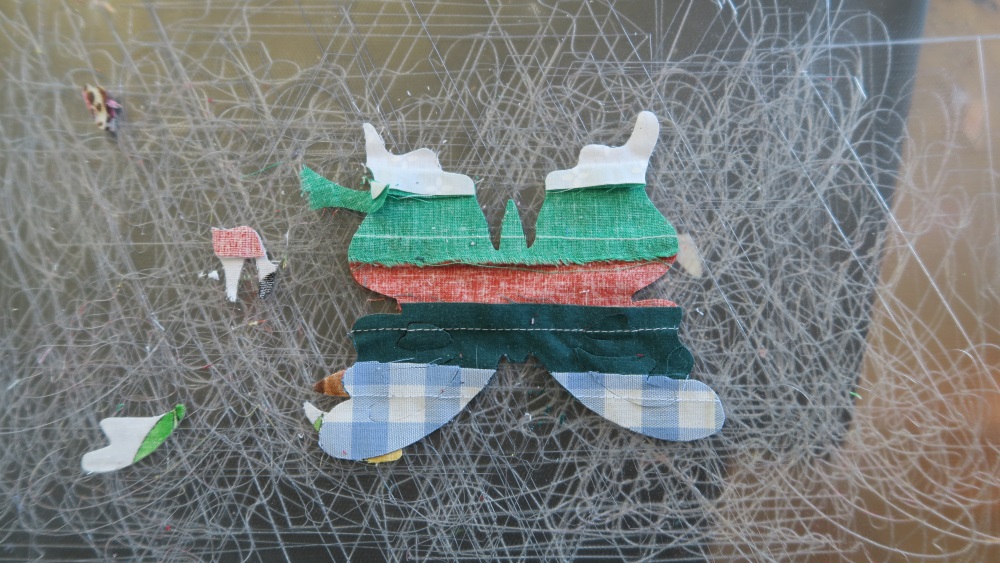
It sticks to the plastic as it comes through because it is scratched up. I gently pull it off.
My plastic is pretty scratched - need to find some nearby. My husband thinks we should be able to get a piece cut for me locally to the right size without having to order another one at a crazy high price for what it is.
I just love how they are turning out! I cut out 33 today and decided that is enough until I know exactly what I'm doing with them as I had cut out 10 a couple of weeks ago. I think it will be an applique project on a whole cloth - with some flowers and butterflies. I'm also still thinking about that one.
My spread. My new butterflies and my previous ones - in the plastic zipper bag. My scraps from this are in the upper right corner of the picture. Some of that is destined for the burning pile but some will be shifted over to the crumbs pile.

And now you know how I made them!
I love all the colors! I will admit to a bit of trepidation when it comes to appliqueing these down!
Next week - hopefully some significant progress in the size of my first strings quilt top.
And while you are here, be sure to check out what my sis has for you in the store section. She's back from her travels in Europe and ready to serve you!
And have a wonderful Monday! I hope you have health and strength to do what you need to do today.