The Making of a Quilt, part 3
My sis is flying through her quilt. Well, not quite flying. The quilting part slowed her down on Saturday..
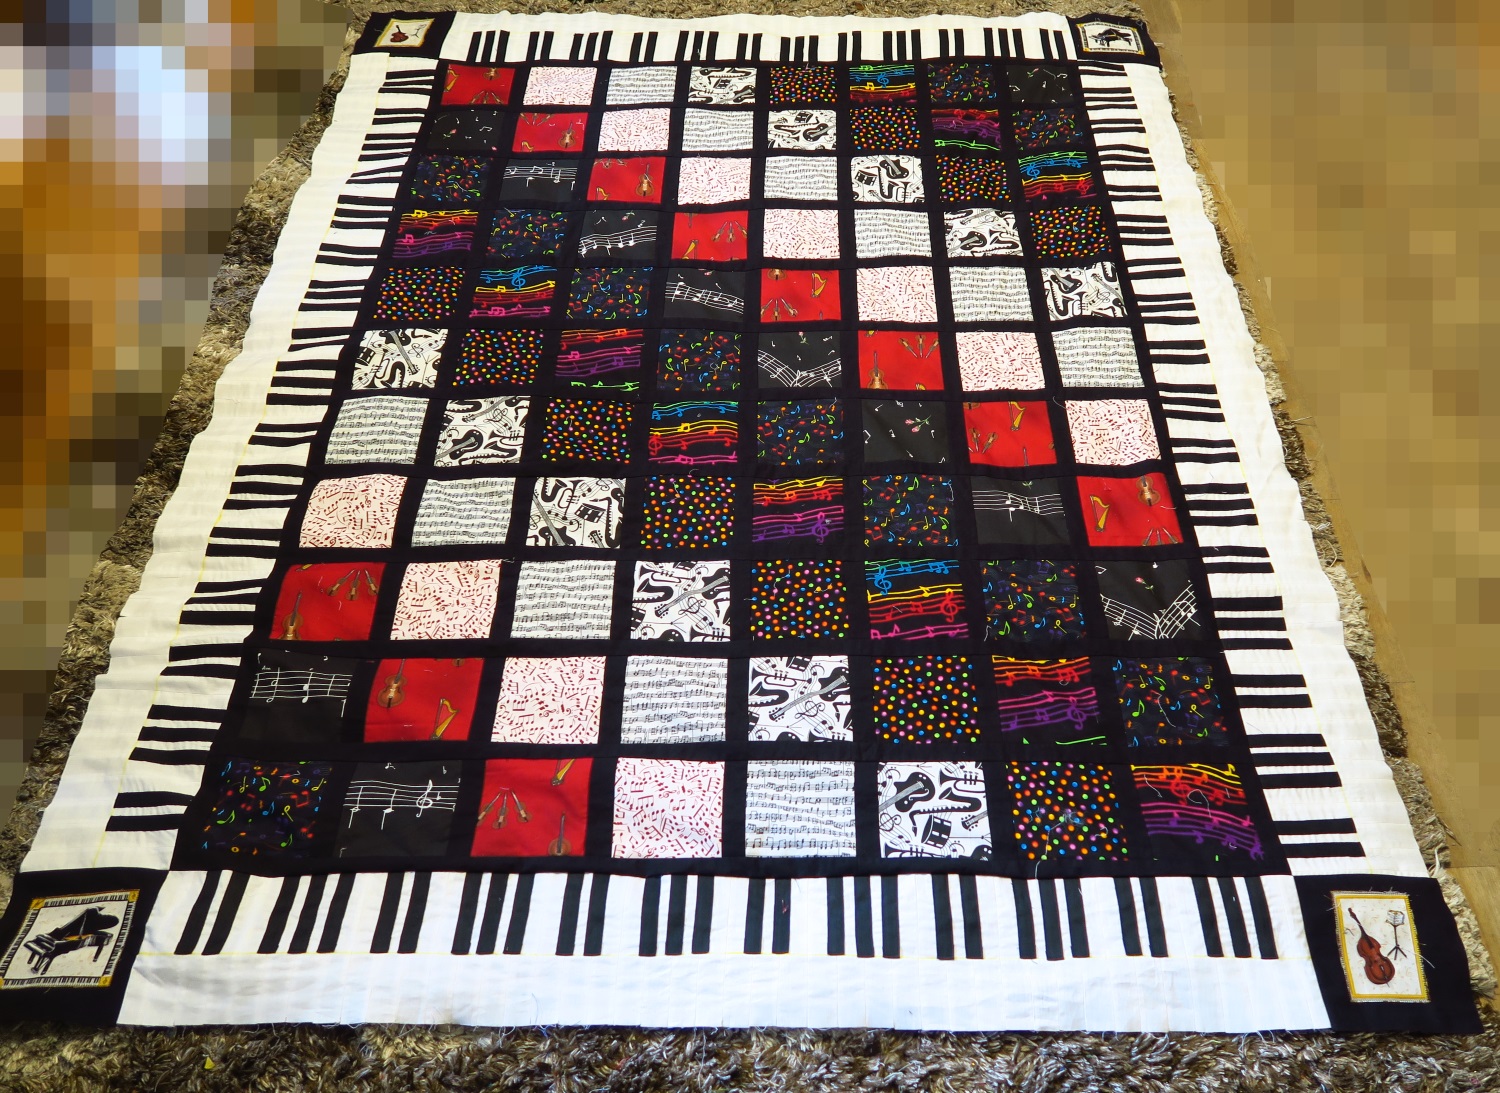
We left it at step 10. Finish the borders. She was making a true piano key border, using white and black ribbon to mimic a keyboard. The lady she is making this for has had a music studio for years.
So let's start with
11. Attach the first two borders

She had to pin the border to the front of the quilt to keep things from getting squirrelly. It's a pretty dramatic border, so she wants all to go very well with it.
12. Make the corner squares using applique and attach the other two borders
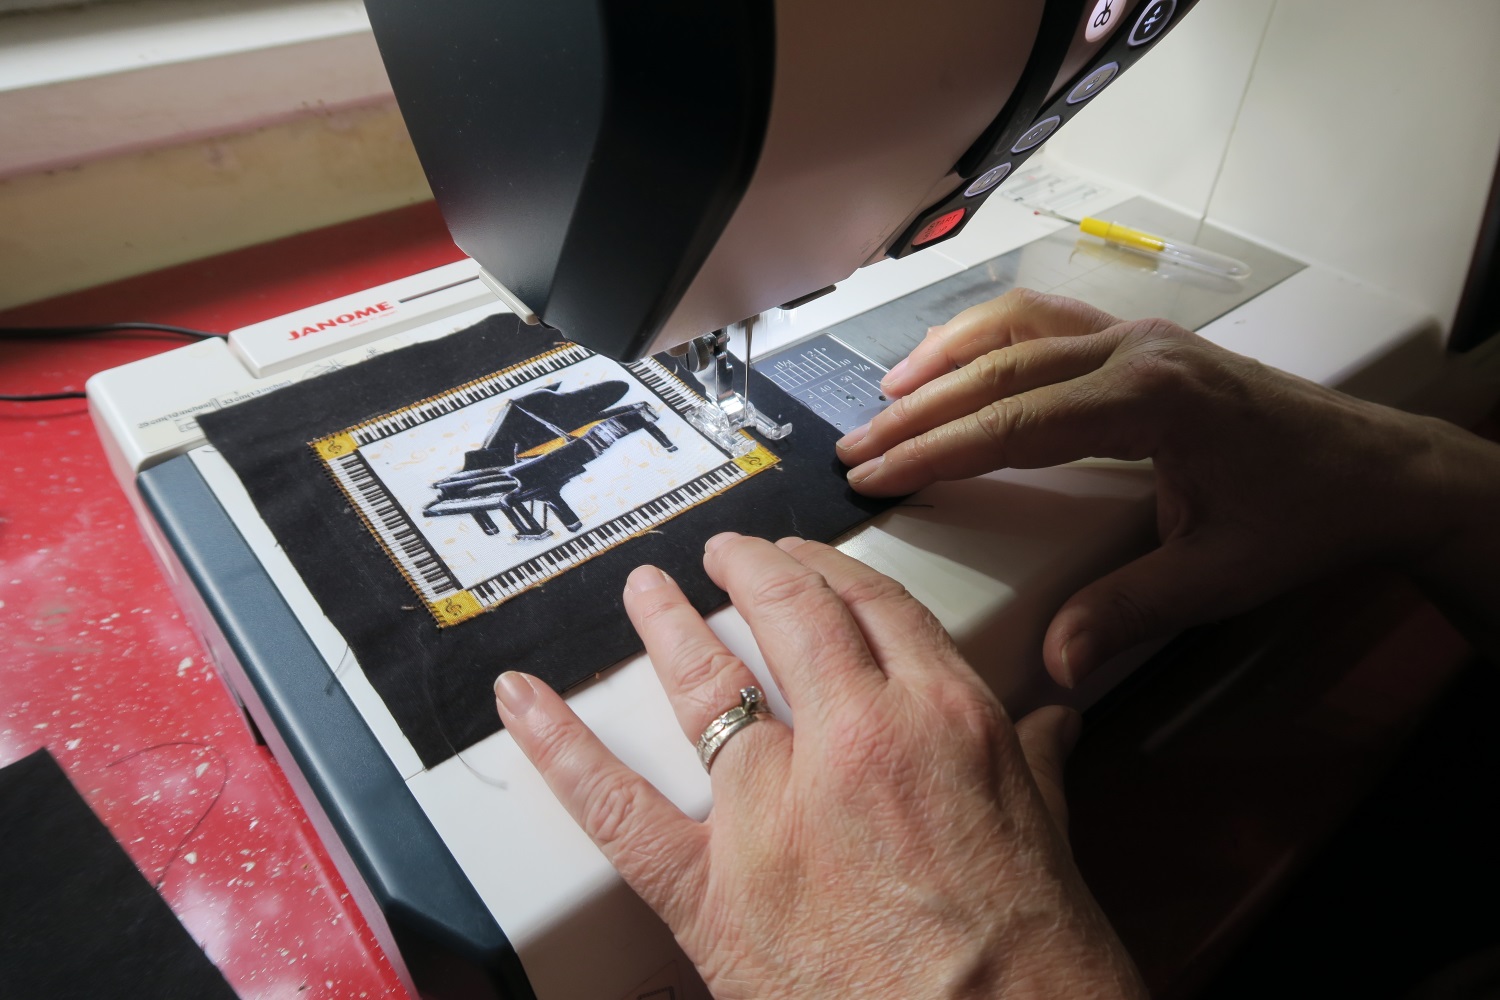
She wanted to incorporate 2 pianos and to other musical instruments on the corner blocks. Applique was the solution to her problem here. She put a small strip of Heat 'n Bond on various parts of the fabric before heating it on to keep down the bulk (thanks for the suggestion, folks - someone told me about that a while ago on my group, Becky Quilts in the Old Country.
13 Check one last time for twisted corner squares or pieces out of line
It's easier to fix now than later.
Top under inspection. Looks fine.
13. Make backing and sandwich quilt

She pieced a piece of red music fabric to two polka dot pieces (black) in order to make a backing the right size. She wanted to center the backing with the top, so we matched centers as we laid it out. I guess we'll check it at the end and see how accurate we got it (after washing).

I helped her. We used pins and spray. Poly batting.
14. Quilt
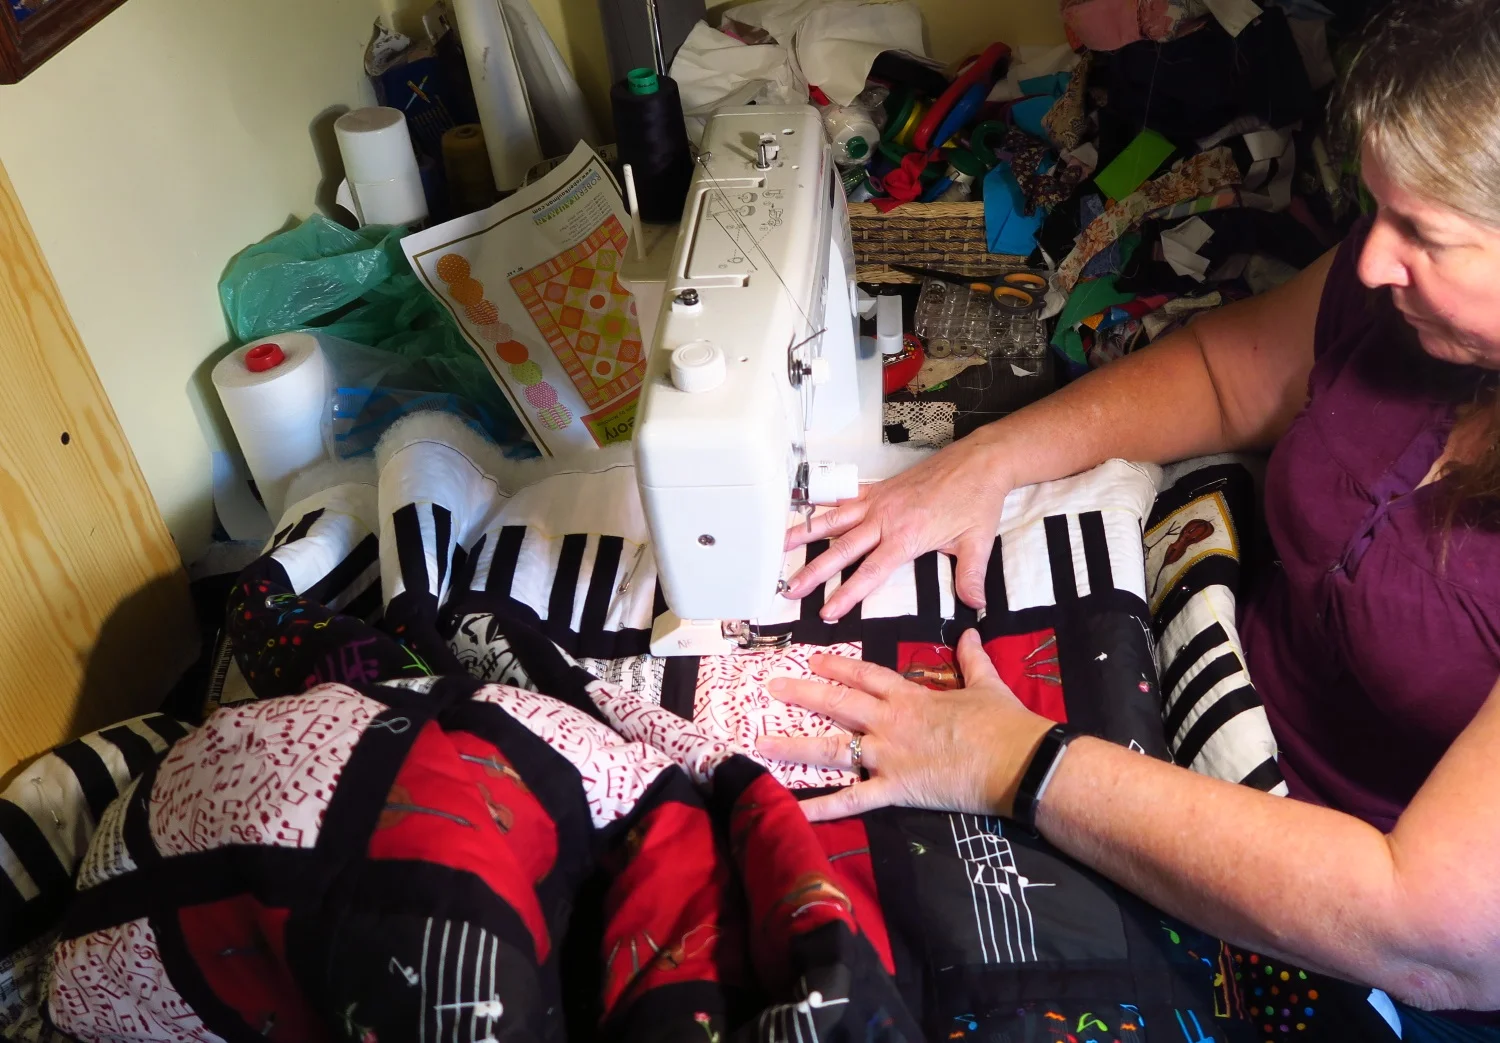
Quilting and quilting. I encouraged her to quilt on both sides of the sashing - as she wanted to do one row of stitching down the center of the black strips (fine for a charity quilt, but this is a gift and it just makes it nicer). She had fun using black thread on black sashing - on each side of this 1" sashing. :) I was probably a slave driver here. Good turn about. She can be one in her business. But it looks amazing! This step took her several hours.
15. Make the binding
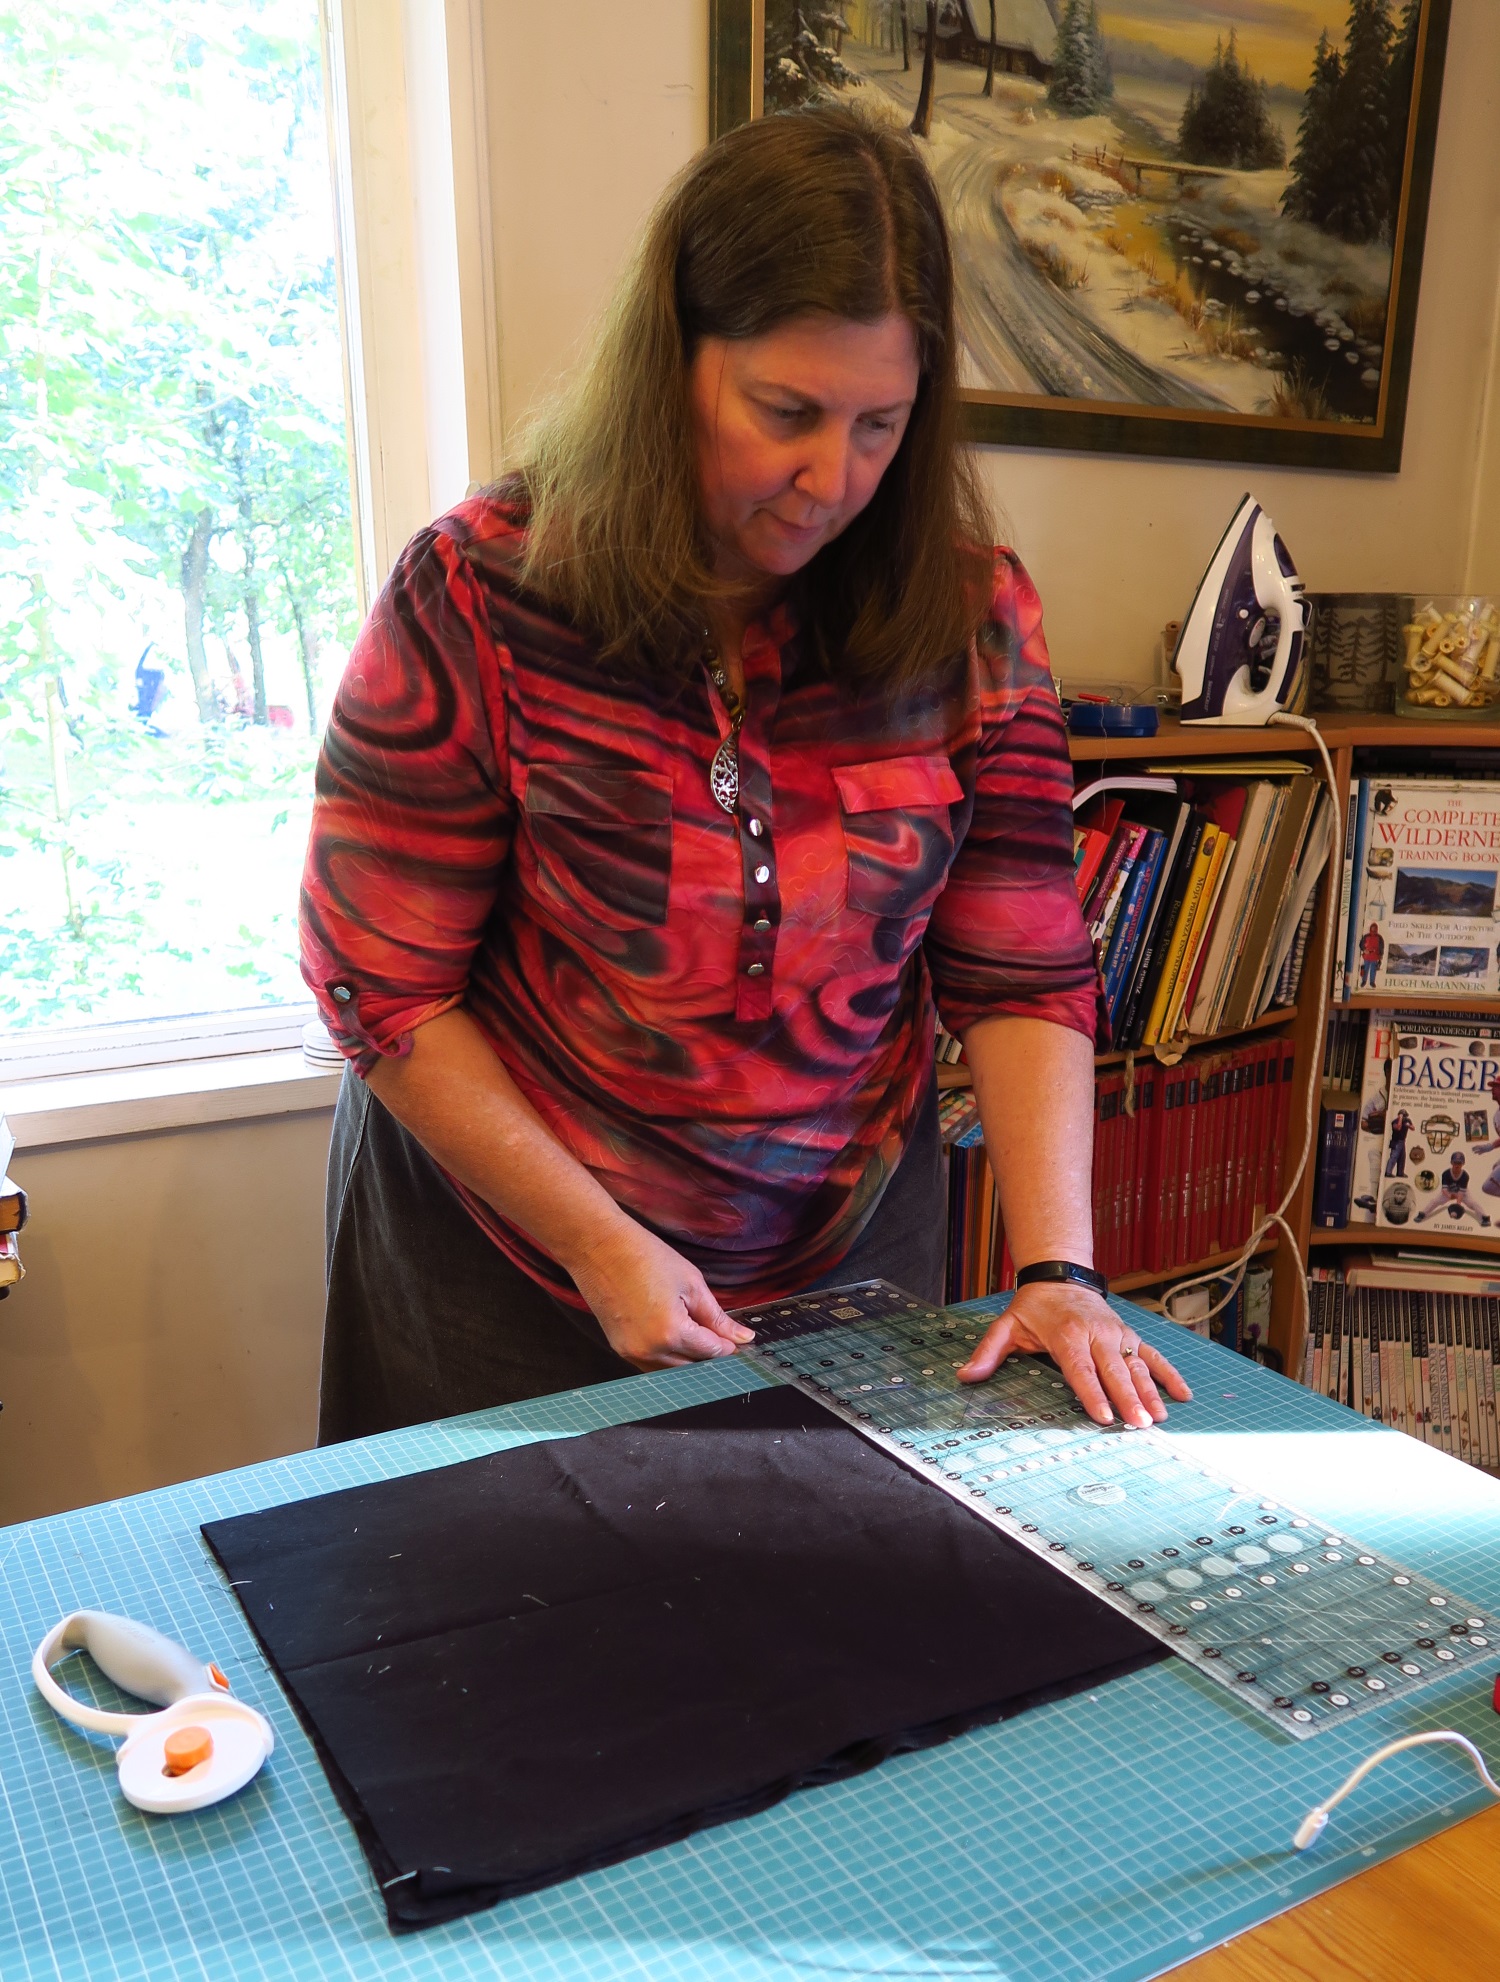
Cutting the binding.

She's pressing the binding strips in half. She needed 5 strips of our black fabric. It's about 62" wide, so we're okay with 5 strips.
16. Sew on the binding on the back side, mitering corners.
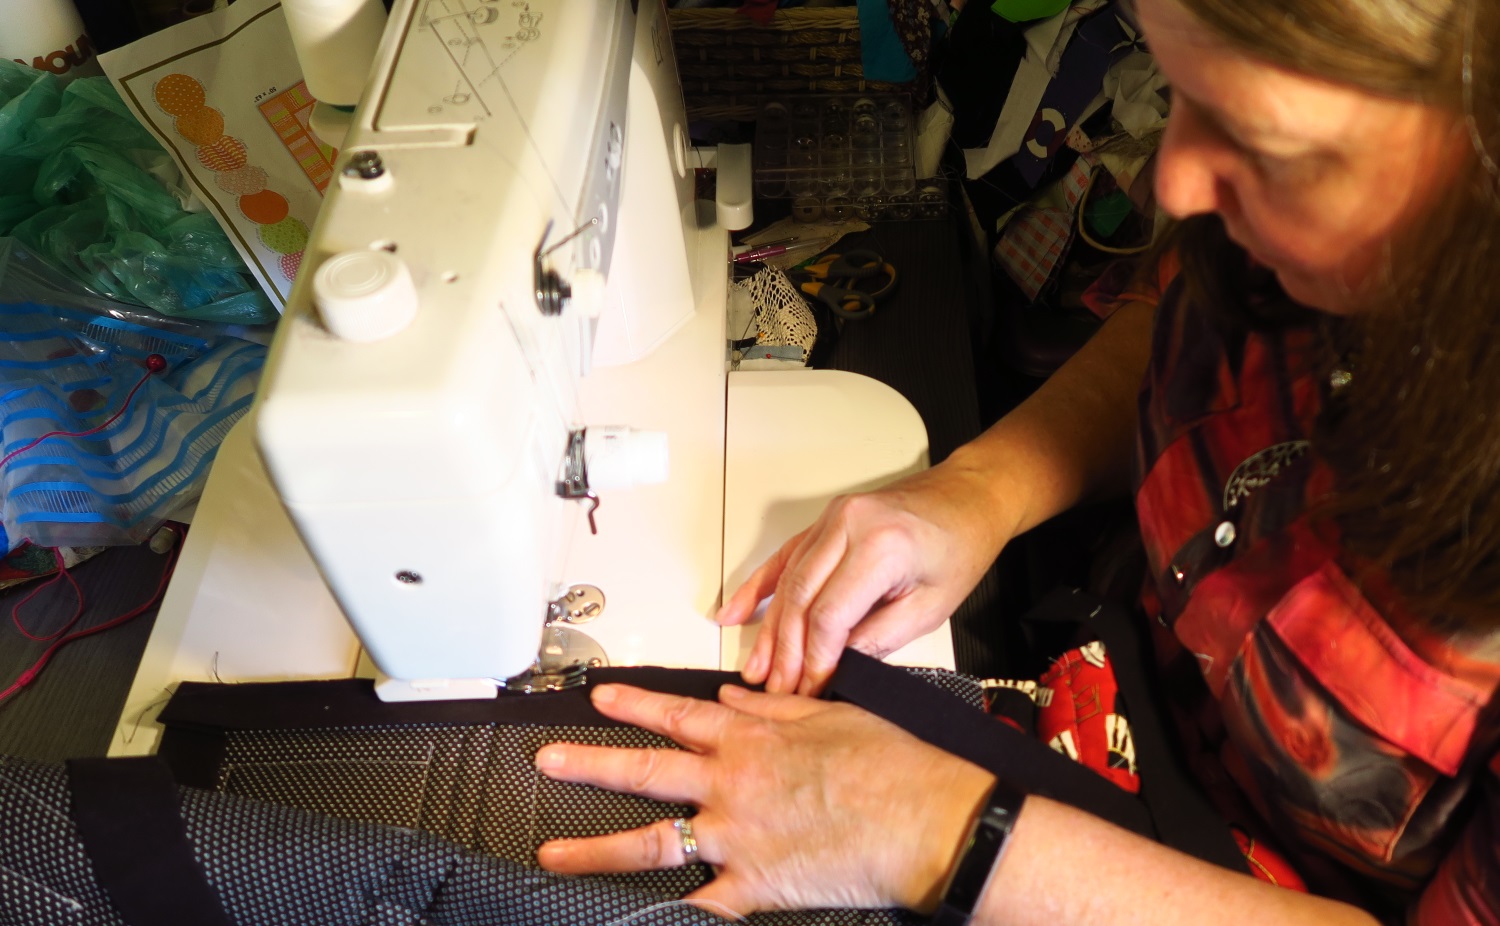
She decided she likes this Janome 1600P straight stitch machine. She used my other machine for the applique, but this is working pretty well for all her piecing work! It's smooth, quiet and runs like a dream.
19. Flip the binding over and sew from the front.

Getting close to being done!! Oh so close!
This "part three" encompassed two days - Saturday and Sunday afternoon/evening.
She started her quilt on Wed. and finished on Sunday evening. We took all of Friday "off" for being tourists and we've taken a few breaks here and there to check social media and post. I can see she's more or less addicted to her phone - but she's probably not as bad as the typical 20 year old! :) I told her to put her phone down and just focus on sewing - she'll get more done!
And there you have it - she's finished her quilt. We need to wash it and get a nice picture outside hanging on my line that my son and I hung.
She's going to have a hard time parting with this quilt!
We explained to my brother in law that this is a gift quilt for another lady. He looked a little incredulous - "Why don't you all just make yourself a quilt if you want one so badly?" he asked.
You see...
She joined this quilt exchange when in one Facebook group one lady was bemoaning the fact that she had never been given a quilt. A bunch of ladies said the same. They finally decided to form a new group and have an exchange. They were paired up and have until about Thanksgiving of this year to get their exchange quilt given. I was kind of worried that she wouldn't get hers done. I told her she needed to come over and make this quilt (among other things). So, when she came, we settled down and I couldn't relax until this was done!
Click here to return to the blog page!


3-5/12 yards of this unknown fiber content solid white is NOT 100% cotton. This would make a good lining or costume for a child's play. It's a non-stretchy fabric.