How I cook my pumpkin!
Recently someone asked on my Facebook page what cooked pumpkin was. I did a quick google search of cooked pumpkin and saw several different things, but nothing quite like I do, so I thought I’d just show you.
Sometimes pictures are the easiest.
First of all, pretty much all the posts said you needed to use the sugar pumpkins - the small ones grown especially for eating. But it’s simply not true. While they may have more taste and be more orange, and be sweeter, etc. you can actually eat your Halloween pumpkins! I wish people would have said that. They are a squash and people eat squash all the time. I’m sure SOMEONE said it, but in the several ones I saw and listened to (YouTube), that’s not what people said.
Anyway...
Wash off the outside of your pumpkin as best as you can - I do not use soap, however - just water!
I chose this one first because it has a bad spot on it and didn’t look pretty. I figured most people might think it had some sort of fungus. However, it was fully ripe, so I decided too cook it up.

Cut the stem off your pumpkin - and I saw a couple of ways to do it.
I do it this way:


Cut it in half and scrape out the seeds and stringy stuff in the middle. Put those aside to deal with - either compost or eating - your choice.

If a small one - put it flesh side down into a pan - mine were small so I could fit two pieces in one pan! Usually can’t do that, actually.

Put in the oven at 350-375F for 1 hour or more—until soft and pliable when touching.

Let cool.
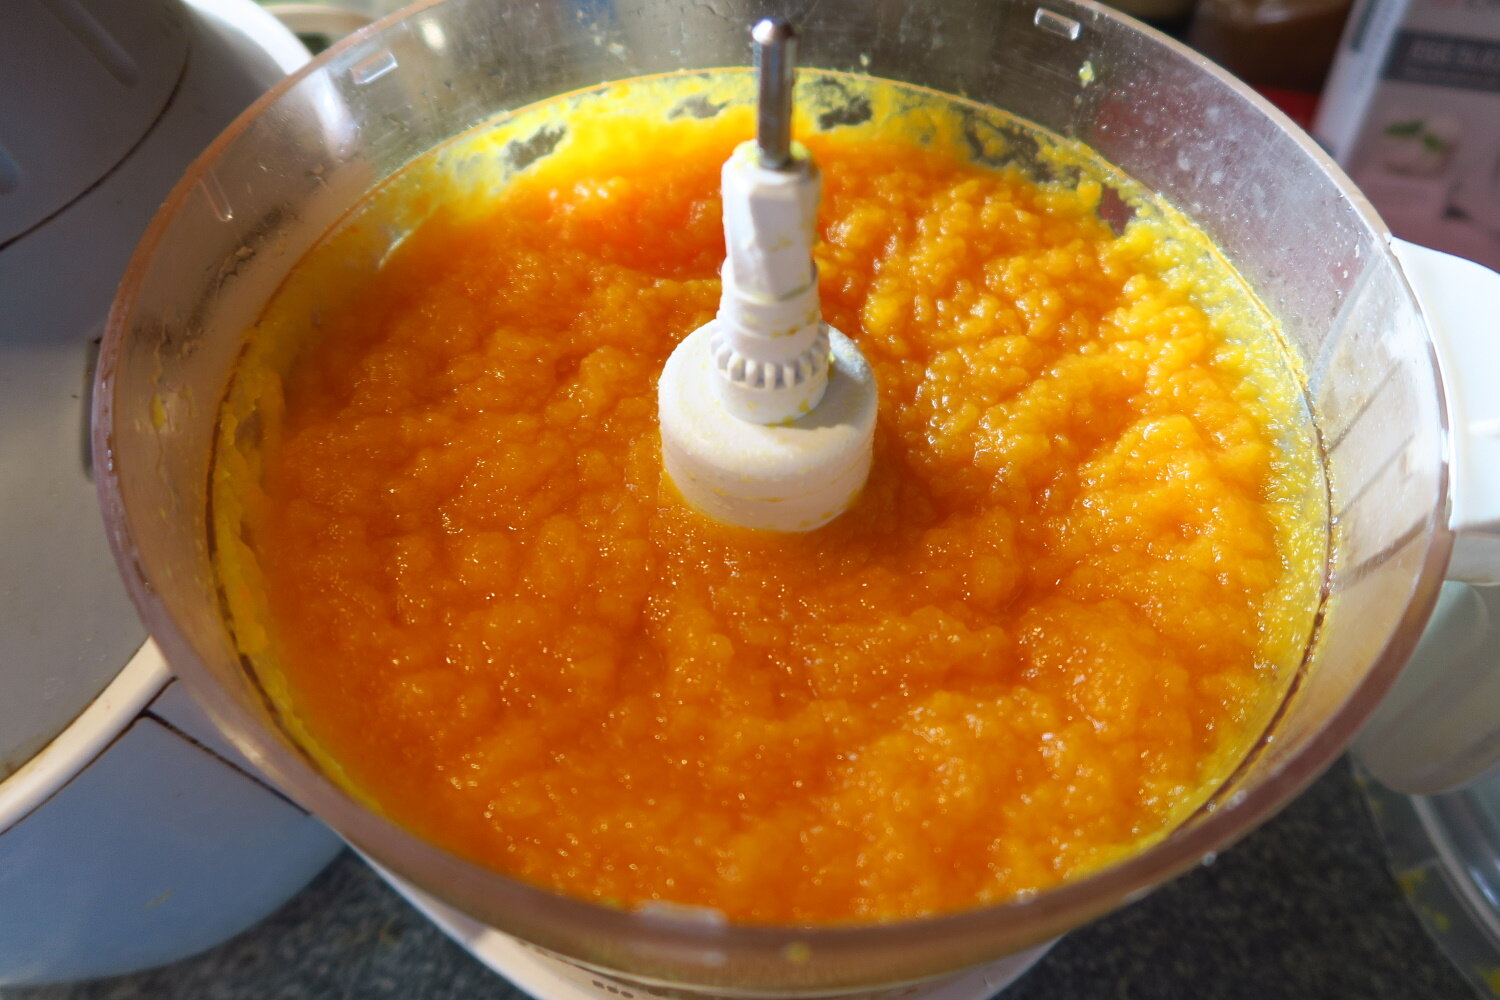
Turn over. Scrape out the soft pumpkin and put into a food processor or blender.


Process til smooth.


Put the processed, cooked pumpkin into a bowl.

Keep doing that until you have finished your cooking for the day.

I then used some of it, measuring it out as the recipe calls for - and put the rest in the freezer.

You can see the different colors of the pumpkin. Both will work in pumpkin soup and bread and cake.
To put in the freezer, get out freezer bags.
Measure 2 cups of pumpkin into each freezer bag.

Close.
Put on a jelly roll pan side by side

Put in the freezer to freeze. Once solid, they can be removed from the jelly roll pan and put in the freezer as neatly as possible.

If I had zipper type freezer bags, you could more easily freeze them “flat” and have them stack even better in your freezer. But I don’t have them (if you do - appreciate them every.single.day)!
I use what I have here - (I’d rather bring over fabric and color catchers than freezer bags in my luggage space!) and what I have is a freezer bag that you close with a little white flexible tie.
And there you are!
100% pure cooked pumpkin.

No preservatives, no additives, and I know what I used to grow it - 100% organic, I guess. ??? No added chemicals - just water and grass clippings! I can’t guarantee, however, that the grass clippings didn’t have added chemicals!
And now you know!
That’s how I do it!
I was able to get 14 - 2-cup bags of pumpkin from what I cooked up plus what I used in recipes that day.
Be sure to check out what my sis has for you in the store!


Colors may vary slightly from what is portrayed. Screens vary as well as our eyes sometimes see things differently, but we've made every attempt to have the color be accurately portrayed.
Price is by the Yard.
100% cotton
41/43" wide
Local quilt shop quality fabric
Batiks are hand dyed, and these are made in Bali, Indonesia.
Anthology Fabrics. High end batik fabrics.
Light Yellow Flowers on Gold