How to Salvage a Wonky Top
Sometimes I make a wonky top - one with too much puffiness in the middle. Sometimes I get them given to me. Sometimes I don’t do anything with them - I just quilt out that fullness. However, sometimes it is more than I can actually do successfully.
Here is one I received from a friend. She knew it was going to present problems for me, but I assured her I could do something with it.

You can see the fullness in the middle and the curve on the edge. I’m not showing this to be make fun - I am showing you so you can see what I did with this.
Let me show you what I did with this top. It’s a charity top - so I felt completely free to play around with it - and that included cutting it up and creating something slightly different but with the same theme - from it.
Since the style of this top is a sort of crumbs/strips/jelly roll quilt top anyway, I decided to cut/slash the top and force it into submission!
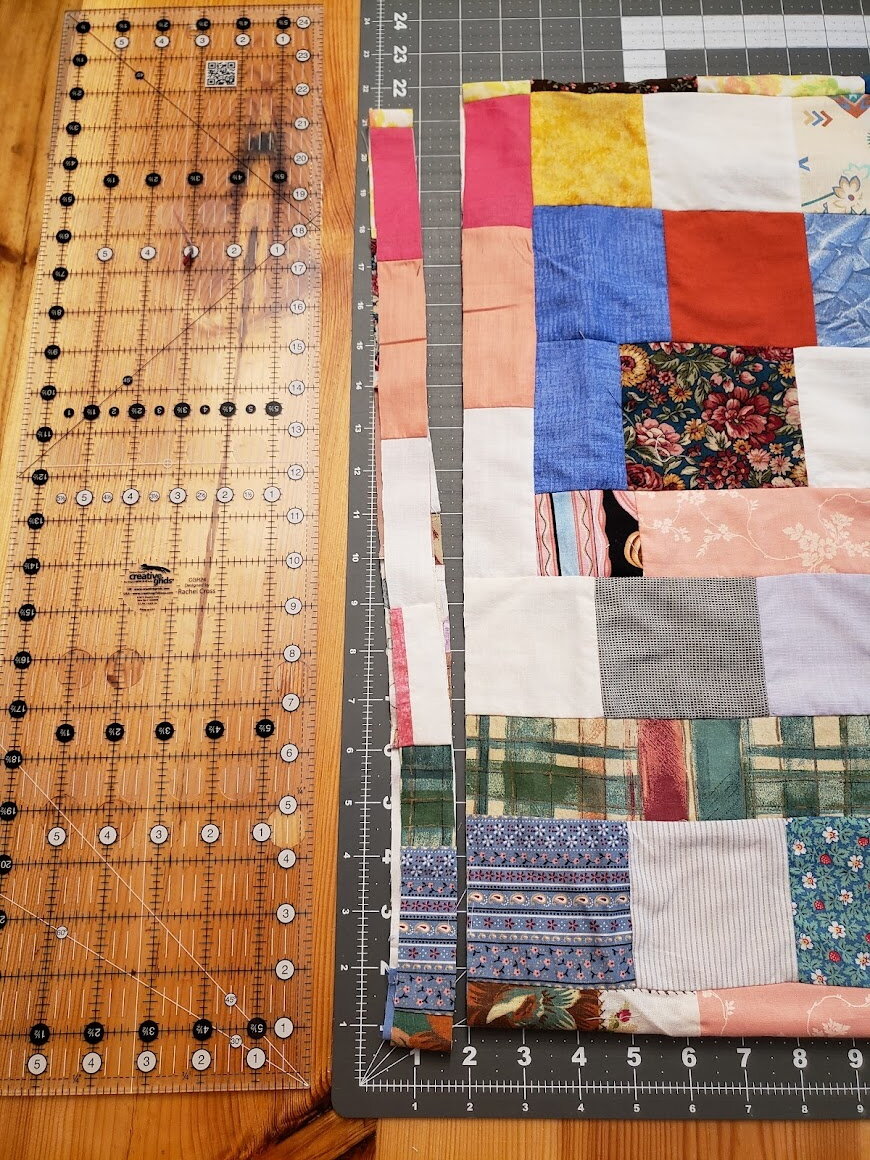
I took it to the table and folded it - and folded it, making it lie as flat as possible with a straight section along the edge closest to me. I then chopped off one of the edges to create a straight edge. I then decided to cut a large-ish cut - 10-13 inches - not sure. I did. I had to move it over to the center, let the fabric settle down and trim again.

Because on the left, it looks like the piece goes ‘out’ - I trimmed down again.

I then moved the main piece down again - and cut.

When I was cutting this, I was looking to make a straight edge along the bottom fold - on the top, anyway. I can’t really see what it looks like underneath, but as long as I started out as straight as possible on at least part of it, I was willing to let the rest just ‘fall where it may’.


Here I’m showing you that I had to keep checking underneath - obviously when I was working on the ends. I wanted to make sure to trim enough away so that it ended up straight.
The key to all of this is to flatten out the pieces as I cut - smoothing it out with my hands and then as the fabric adjusted and the fullness would change the layout of the fabric, I would trim off again - anything that was sticking out. I didn’t worry about the actual pieces that I was cutting. I was aiming for a straight strip on the mat, which I used extensively.


Here you can see that I am going to trim off this as the underneath part of the strip is wider than the top. This is part of the adjustment and when the fullness is coming out of the top. There was actually something quite satisfying about doing this. It’s hard to explain.
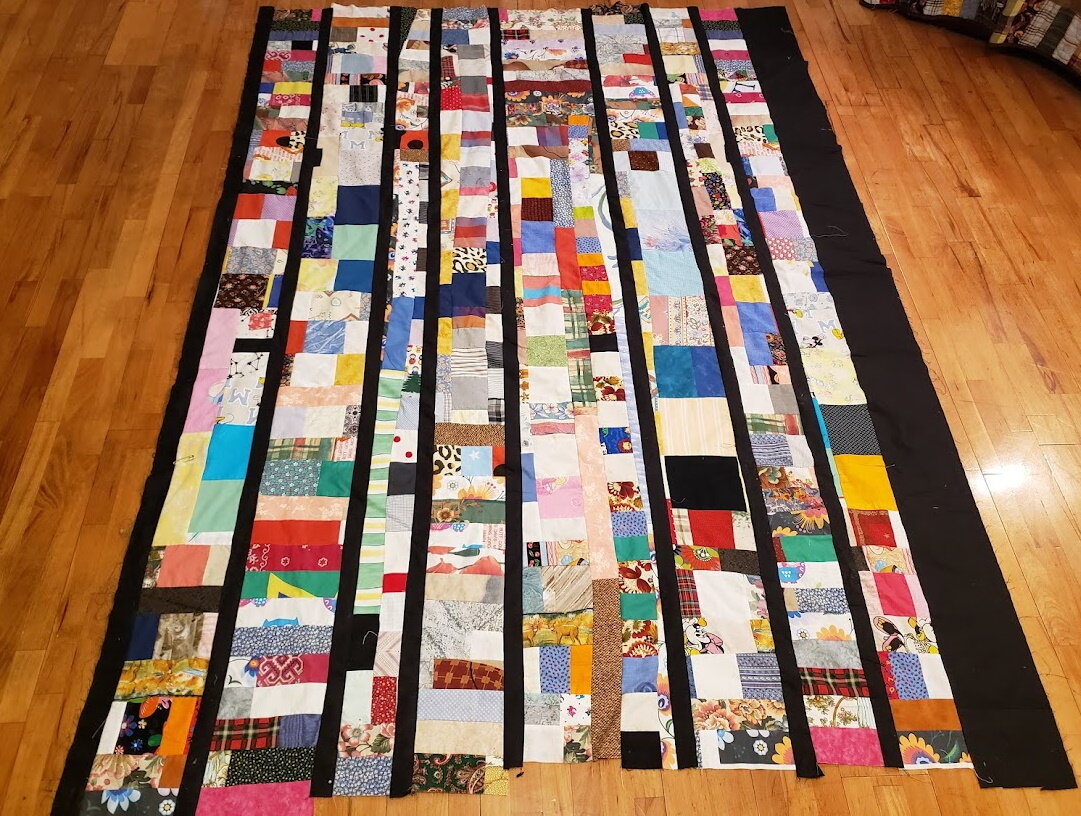
I decided to try to bring cohesiveness with black. I cut 2” strips.

I laid out the strips and placed them in the order that I thought I wanted them on the floor. Because of the type of top it was, it was really not all that important HOW these strips were arranged. It is meant to be a "random” type of top. I really thought I got a photo of this step. Apparently I didn’t get my layout. Sorry about that.

When I attached the black strips, I put the crazy strip pieces on the bottom because it is too easy to stretch them if they are on top - I’m less likely to stretch things that are on the bottom as it feeds through the machine.


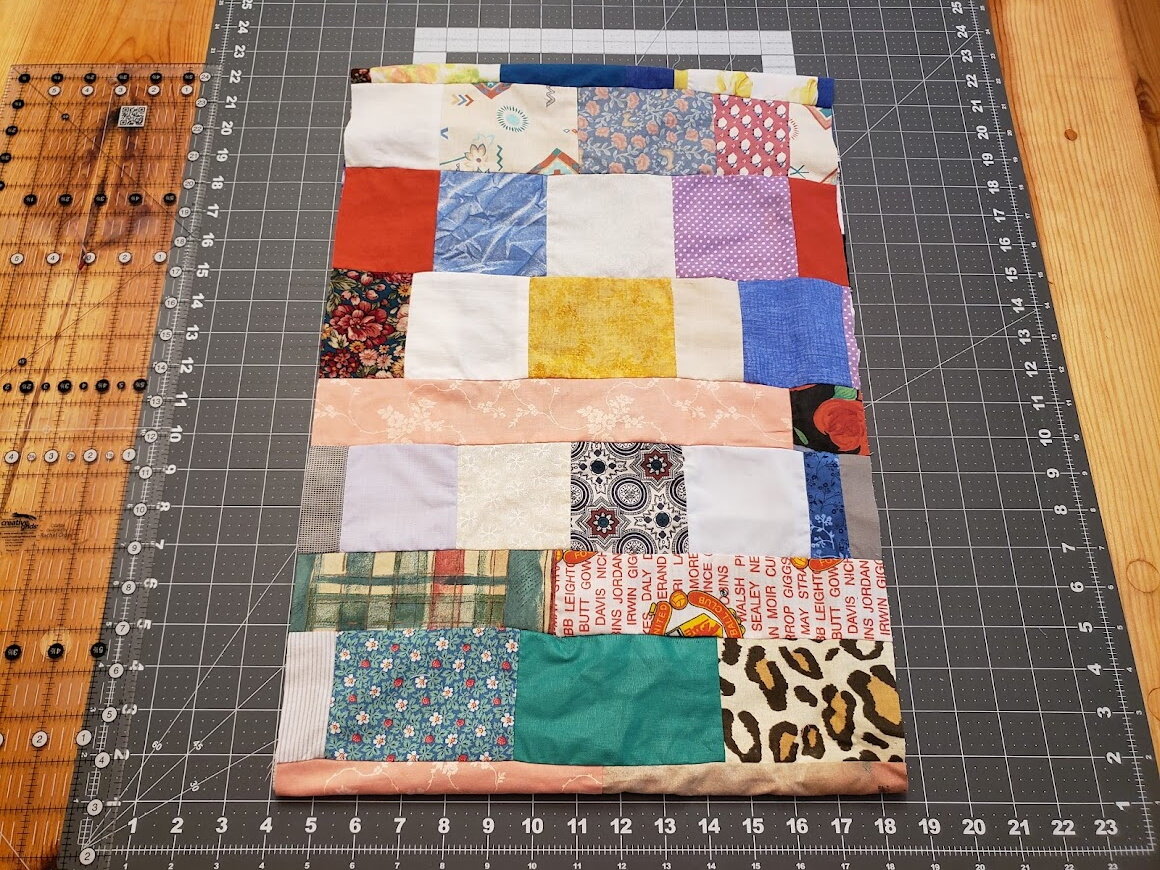
Once I had sewn the black to half of the strips - I combined strips to create the top.

While I tried not to flip seams - it is much harder when I’m sewing and not looking at them. I’m really not worried about it because poly batting is thick and you don’t even notice those flipped seams once it is quilted. Promise.
Here’s the top as it is almost finished. I added a wider black piece to the one side to reinforce the idea that it’s all crazy. I needed the top to be closer to 60” than it ended up being due to all that I had to cut off - even though I added black strips. It hadn’t really been 60” wide to start with anyway.
While it isn’t perfectly even at the top and bottom, at least now it is flat! Yeah!
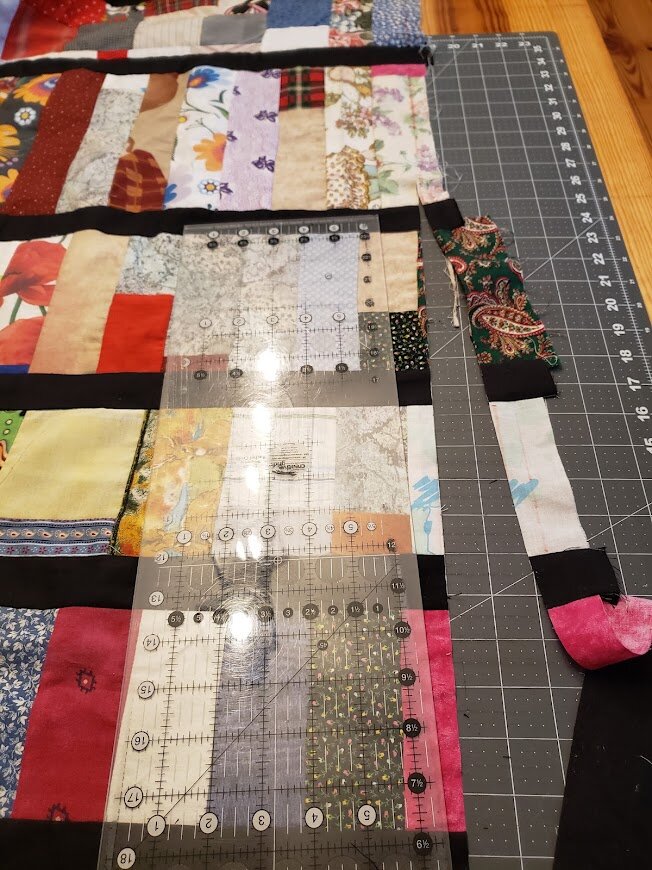
I need to still trim the top and bottom in this photo. This will make it shorter than I want, so I will add black to make it long enough. Because I have a 2” strip on one side, and a much wider strip on the other, I will add a different width to the top/bottom.
Here’s my process of trimming.
I put the top on the floor and used my corner laser measurer, and lined it up with the corner. I then marked a straight edge with a washable Crayola marker and after marking both ends, put the top on the table and trimmed off using a ruler and rotary cutter.


I found mine locally second-hand. I see similar ones on Amazon. You can probably find something like it on Ebay as well.
Before I continue - here is a photo of the laser level and square -
I’ve had several people comment on this laser level and square already so I am going to give some links from Amazon on similar items. These are all affiliate links, meaning that we get a tiny bit of money should you order from this link (it doesn’t cost you any more or less to use these links).
Dewalt laser level and square (similar quality to what I have). $69.99
Bosch laser level and square (a similar quality to mine) $43.99
Much cheaper ones but unknown to me brands:
XCsource right angle 90 degree laser line $12.69
Qwork right angle $13.99
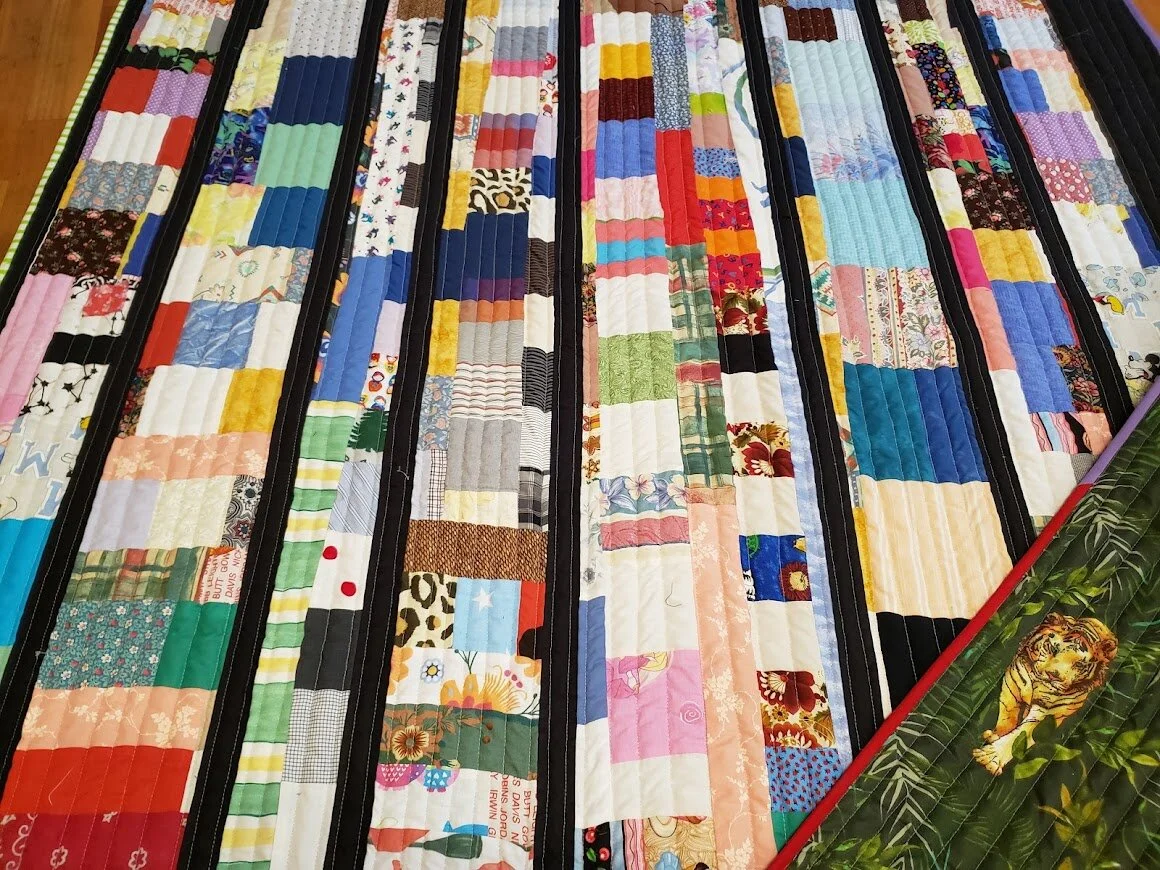
Here is the top after I added borders to the top and bottom but before quilting.

Here it is after I’ve trimmed and put black pieces on the other two edges. I’m letting you see two other charity quilts I’ve recently finished quilting but need to do the trimming and binding.

At this point, I took it to the table and sandwiched it - using the tiger print on the background. I’m thinking a man will take this quilt, so didn’t want to put flowers.
Sadly I didn’t take any photos of that step.
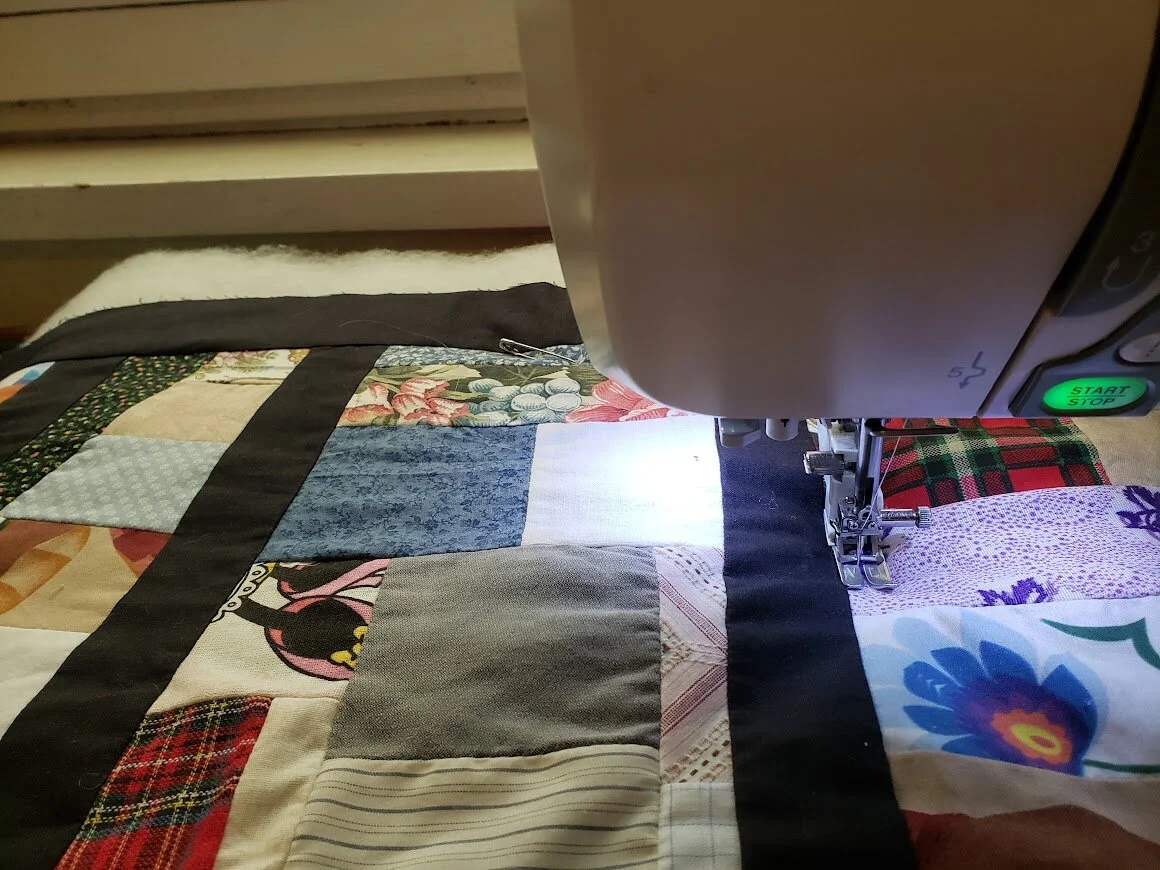
Then I took it to the machine and quilted it. I don’t normally quilt charity quilts so densely but with this one, I’m making a point just for the blog post. So it got quilted densely.
I just eyeball or use the edges of the black strips as a guide for the quilting lines, not worrying about keeping them perfectly the same. This kind of quilt top needs a bit of ‘not quite perfect’ quilting (as if I could do that anyway)!
At least that’s my story!


Isn’t it cool?
At that point, I took it down to the table, trimmed off the edges, and picked out some scrappy binding pieces (just 2.5” strips), made a binding and went ahead and finished it- including putting on our label and the washing instructions tag.


I like it. As of this writing (and the photos) it hasn’t been washed yet. Probably those edges will flatten out a bit better, esp. if I dry it flat on the table. This kind of quilting kind of acts almost like pleating, so it is no surprise the edges on the top and bottom act like this.
All finished except for the washing, drying and official photography. Then it will go into the charity quilt pile.
And here’s the contrast. I know the first photo isn’t very good. Sadly it is all I took from this direction. it hope it is good enough for you to see the difference, however, in the fullness and wonkiness of the top in size and extra fabric in the center.

Before - as a top I received to be used for charity

After - as a finished quilt
In this case, I have no doubt someone will choose this quilt. Someone will think it is interesting - or else they will love the back - doesn’t matter. It will help keep someone warm this winter - hopefully!
Have a great day wherever you are reading this! Thanks for coming along with me on my quilting/sewing journey!
Be sure to check out what my sis has for you in the store here!
Here’s one of the beauties we have!
