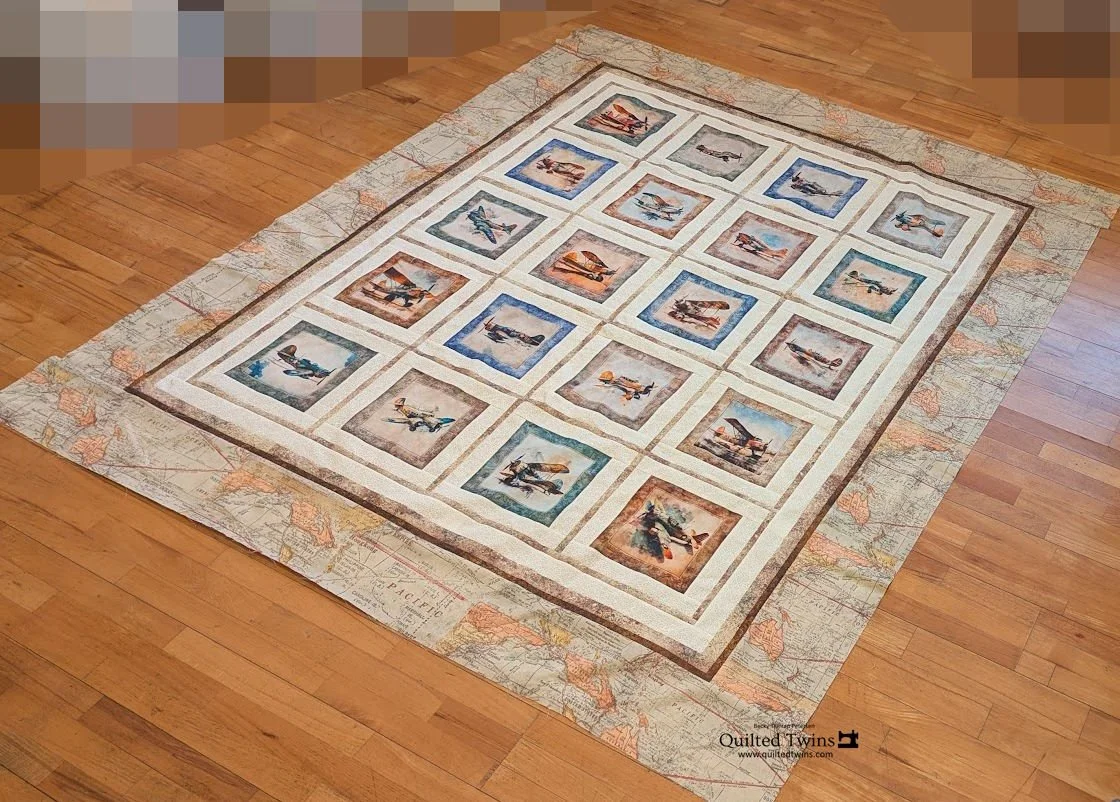
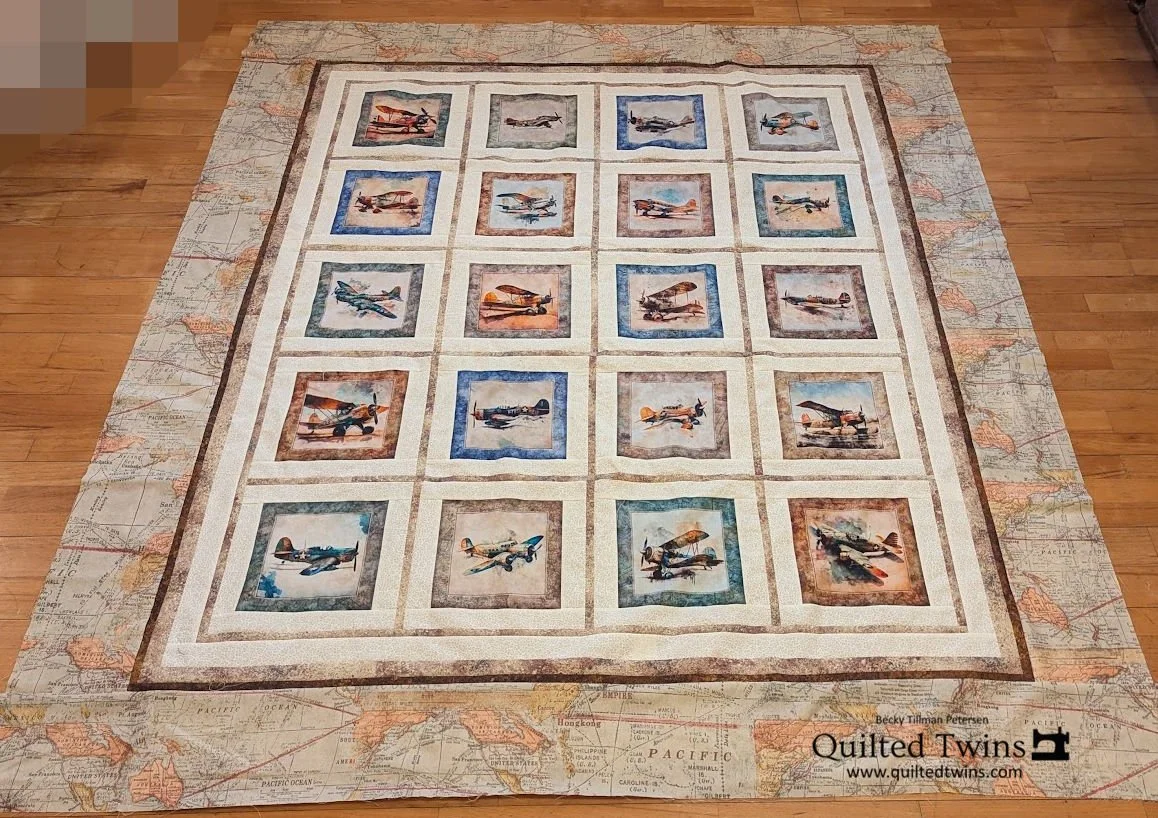
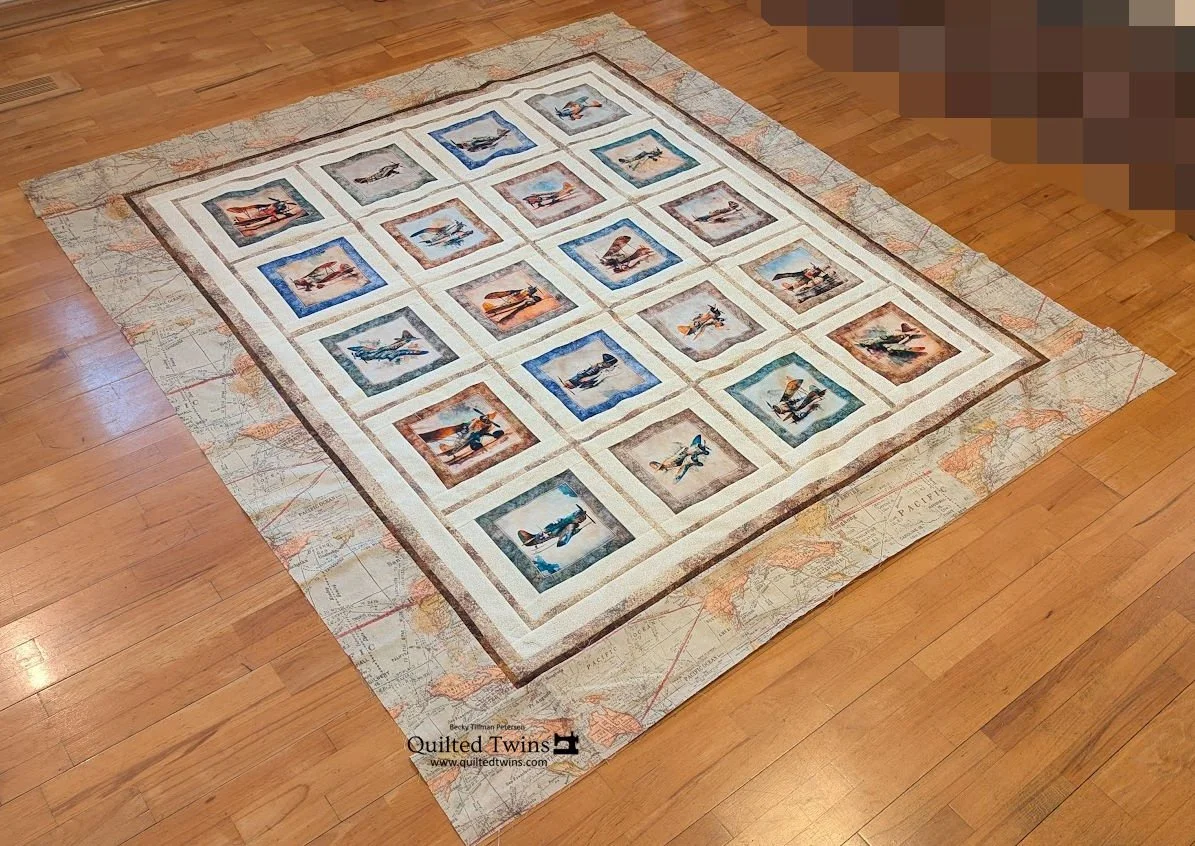
"Flying High" quilt top - a simple one - Airplane series #1
This quilt is the first of an unknown number featuring planes.
This is a series I’ve put off - for years. It’s time to stop putting them off. Time to make some of these things I really have wanted to make.
My husband is a pilot. His brother is one as well. His BIL is also one. His dad was too.
I am not sure where I will go with the series, but this is the first one. I do have a pattern I purchased that will be the next one. I then have some fabric from Moda that I will use to make up something nice.
I ended up with these blocks. I had completely forgotten about them until I came across them in my sewing room, all cut apart, and nicely stashed together, ready to be used. I was grateful there was an even 20!
I had to go on line to find out what the panel was called since all I had was a pile of blocks that were obviously a panel!
This panel quilt is part of a line of fabrics by QT Fabrics.
Sadly, Quilted Twins is out of these panels, but we do have some of the accompanying fabrics which can be found here for a great price! I don’t appear to have them here in Poland, however, so I just put together this top without the additional fabrics in the line.
I used a cream on cream type of fabric for the sashing. Because the blocks are such a difficult size to work with, what I did was trim the blocks to within 1/4” around the block. Then, because mine had cream around the blocks and not navy as some were, I used a cream sashing strip (I saw on line that some in this line used navy). I added a piece of sashing 2” cut to each side of the block. I then pressed everything nice and trimmed the blocks to 10.5” square, I could have trimmed to 9.5” squares instead but I wanted the bit larger blocks. I then used a 1” cut strip between the blocks. That little sashing piece ended up finishing at 1/2”.
Once I had the blocks trimmed to 10.5”, I did add the 1” strips to the right and top of each block. I added the rest of the little sashing brown pieces to the left and bottom all in one long strip after I got the top together. It took a while for me to decide where to put the different planes.

For the borders, I just repeated the same fabric for the first border - you can find those fabrics here at our site here.
Then I used a daker Stonehenge for a very skinny border (once again, cut 1”) and then a larger 6.5” cut border, I believe. The idea behind the darker Stonehenge was to create a stop border for the eye and to mimic the darker edges of the individual blocks in the center of the panel.
The entire quilt is 62”x72” as a top, before quilting and binding.
I hope you enjoy! It was really enjoyable to put together this quick quilt top - partly because I was working with a panel and it went together quickly and partly because the fabrics all felt so silky and nice! It was a pleasure to use them all.
Thanks so much for coming along with me on this journey!
Have a great day wherever you are reading this!
Be sure to check out what my sis has for you in the store here!
Feel free to browse the site.