Adding machine tape frenzy

Last week, due to my husband's knee surgery and the subsequent changes to my routine, I was having a hard time focusing on any one thing. i decided that it was a good time to get some misc. clean up done in the sewing room. I mean by that, time to sew some small, otherwise-unusable scraps together.
I could have made crumb blocks, but I had a couple of rolls of adding machine tape sitting around in my sewing room. One of the rolls wasn't completely finished and I figured I could just add to it.
So, I decided to finish up the roll.
(Then I decided to do something with it. Unfortunately, I took the top I made back apart, so I won't show that to you as I was quite unhappy with it - don't worry - it didn't take that long to take it back apart as I just ripped it on the stitches - it was a strippy style. I didn't mind the style - just not the fabric I chose to pair with my strips. I'm still thinking.)
Anyway..
Here's what I did.

1. Start with adding machine tape. I have 2 sizes actually - one skinny - about 2 3/4" wide and the other is just under 4" wide. I found the wider tape at an old 5 and 10 store in Newton, KS where they had a bunch of untouched things for sale - can't imagine how the owner actually stays in business there. I wandered around and asked about wide adding machine tape. He had some so I bought 6 rolls of it - I knew I had to bring it over in my suitcase and it was heavy, so I refrained from getting more than 6 rolls. I've not seen any wider than that -but then, I've not checked ebay, etc.
2. Sew pieces on the tape. I overlapped the previous piece when I did it. I sewed in random directions. Occasionally if I had a problem with edges showing I pulled out ribbon that I had and sewed it to the top of the raw edges so they were completely encased. I also did that for variety.

This was some cut off pieces of a strips for a bargello quilt I made. These pieces are cut offs and suitable only for crumb blocks.

I sewed the blue down and then over the top of that, I put the next piece. Will sew it next.

Tacked down the edges for security

Added another 2 patch to the edge of that triangle.

Sewed a trimmed portion to the edge and sewed the edge to hold.

Sew down the pale piece on top of the blue.

Sewed another triangle piece over the edge as shown

Pulled it out and sewed it down

The previous bit left a bit of a raw edge that will show into the seam, so I covered it with ribbon which I folded under. This way there will be no raw edges in the finished strip of fabric.

Here is a my little strip that I started just to show you how I work.
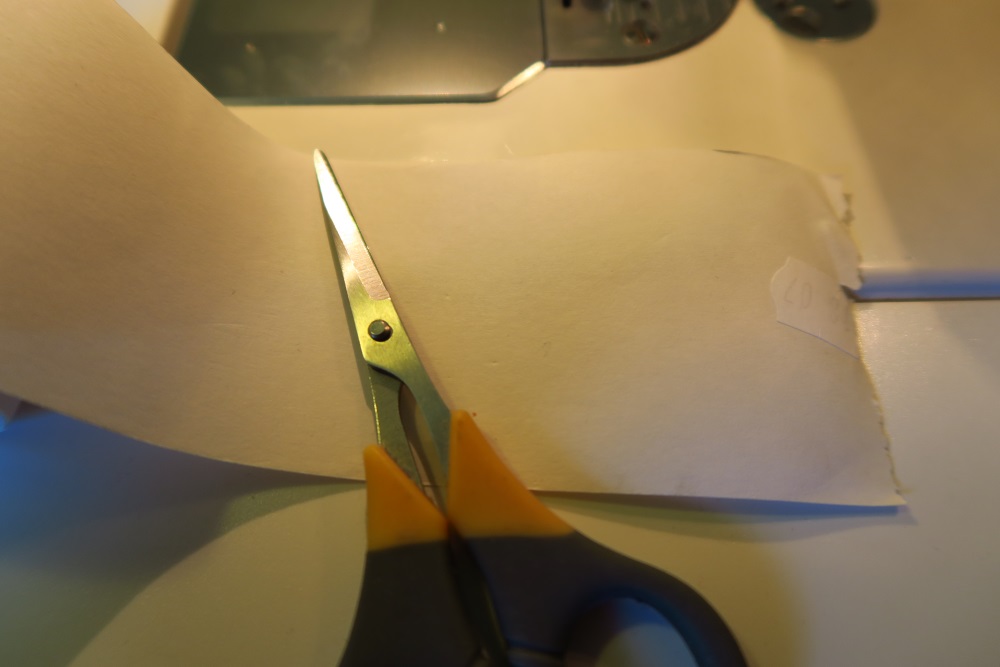
3. After sewing a bit and having it look pretty out of control, I sewed in about 1/8" from the edge of the tape on the paper side and then trimmed with my scissors to the edge of the tape. Then I rolled it back up until the next time I was ready to work with it.

Sewing in about 1/8" from the edge on the paper side

Now you can see an overview of the whole strip of madness.

Trimming.

What it looks like after trimming

Now it's time to roll it back on the roll.

My roll. This is one of those tiny rolls of adding machine tape. Here in Poland that roll costs about 75cents.
In this case, however, I had a whole 'nother roll finished and wanted to go ahead and use it.
4. I used my kitchen table and measured out the length of the tape (with fabric sewn on to it) and cut as many a I could to the same length - in my case it was 96". I cut 10 out of my one roll.


5. I added black 1.5" cut strips to each side of the strips. I had cut the fabric strips to the same length as the paper backed fabric. Press flat. (The paper is still on the back, by the way).


End result so far.
And that is where I sit. Hopefully this week I can figure something out.
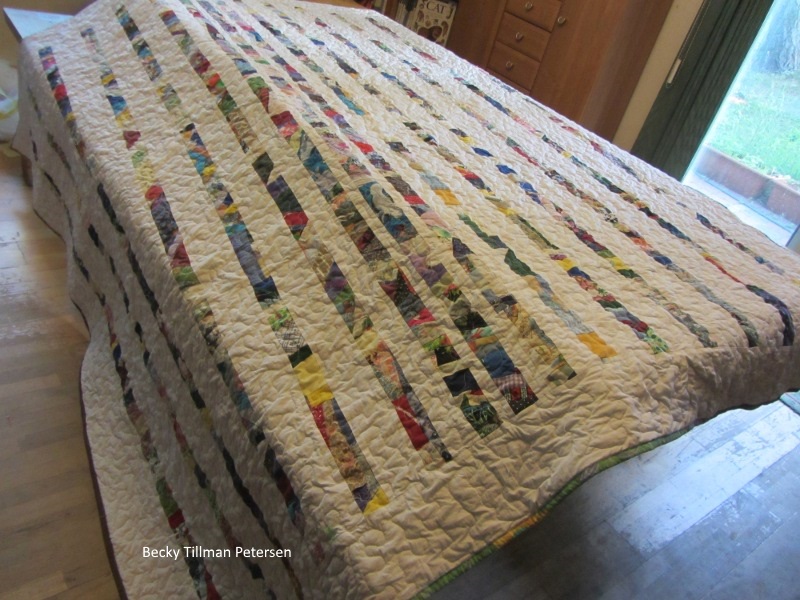
In the past I've made two quilts with these things - here they are. I do want to feature the fact that these are random and scrappy and all different odds and ends--I don't want to hide that fact. The top I referenced in the first two paragraphs that I took apart I did so because the fabric in between the strips overwhelmed the strips themselves and the charm was gone.

And now you know...This is how I add random pieces of leftovers to adding machine tape and then use them in a top.
And
If you happen to need some gorgeous fabrics at good prices - check out what my sis has for you in the shop!


Vivamus pellentesque vitae neque at vestibulum. Donec efficitur mollis dui vel pharetra.