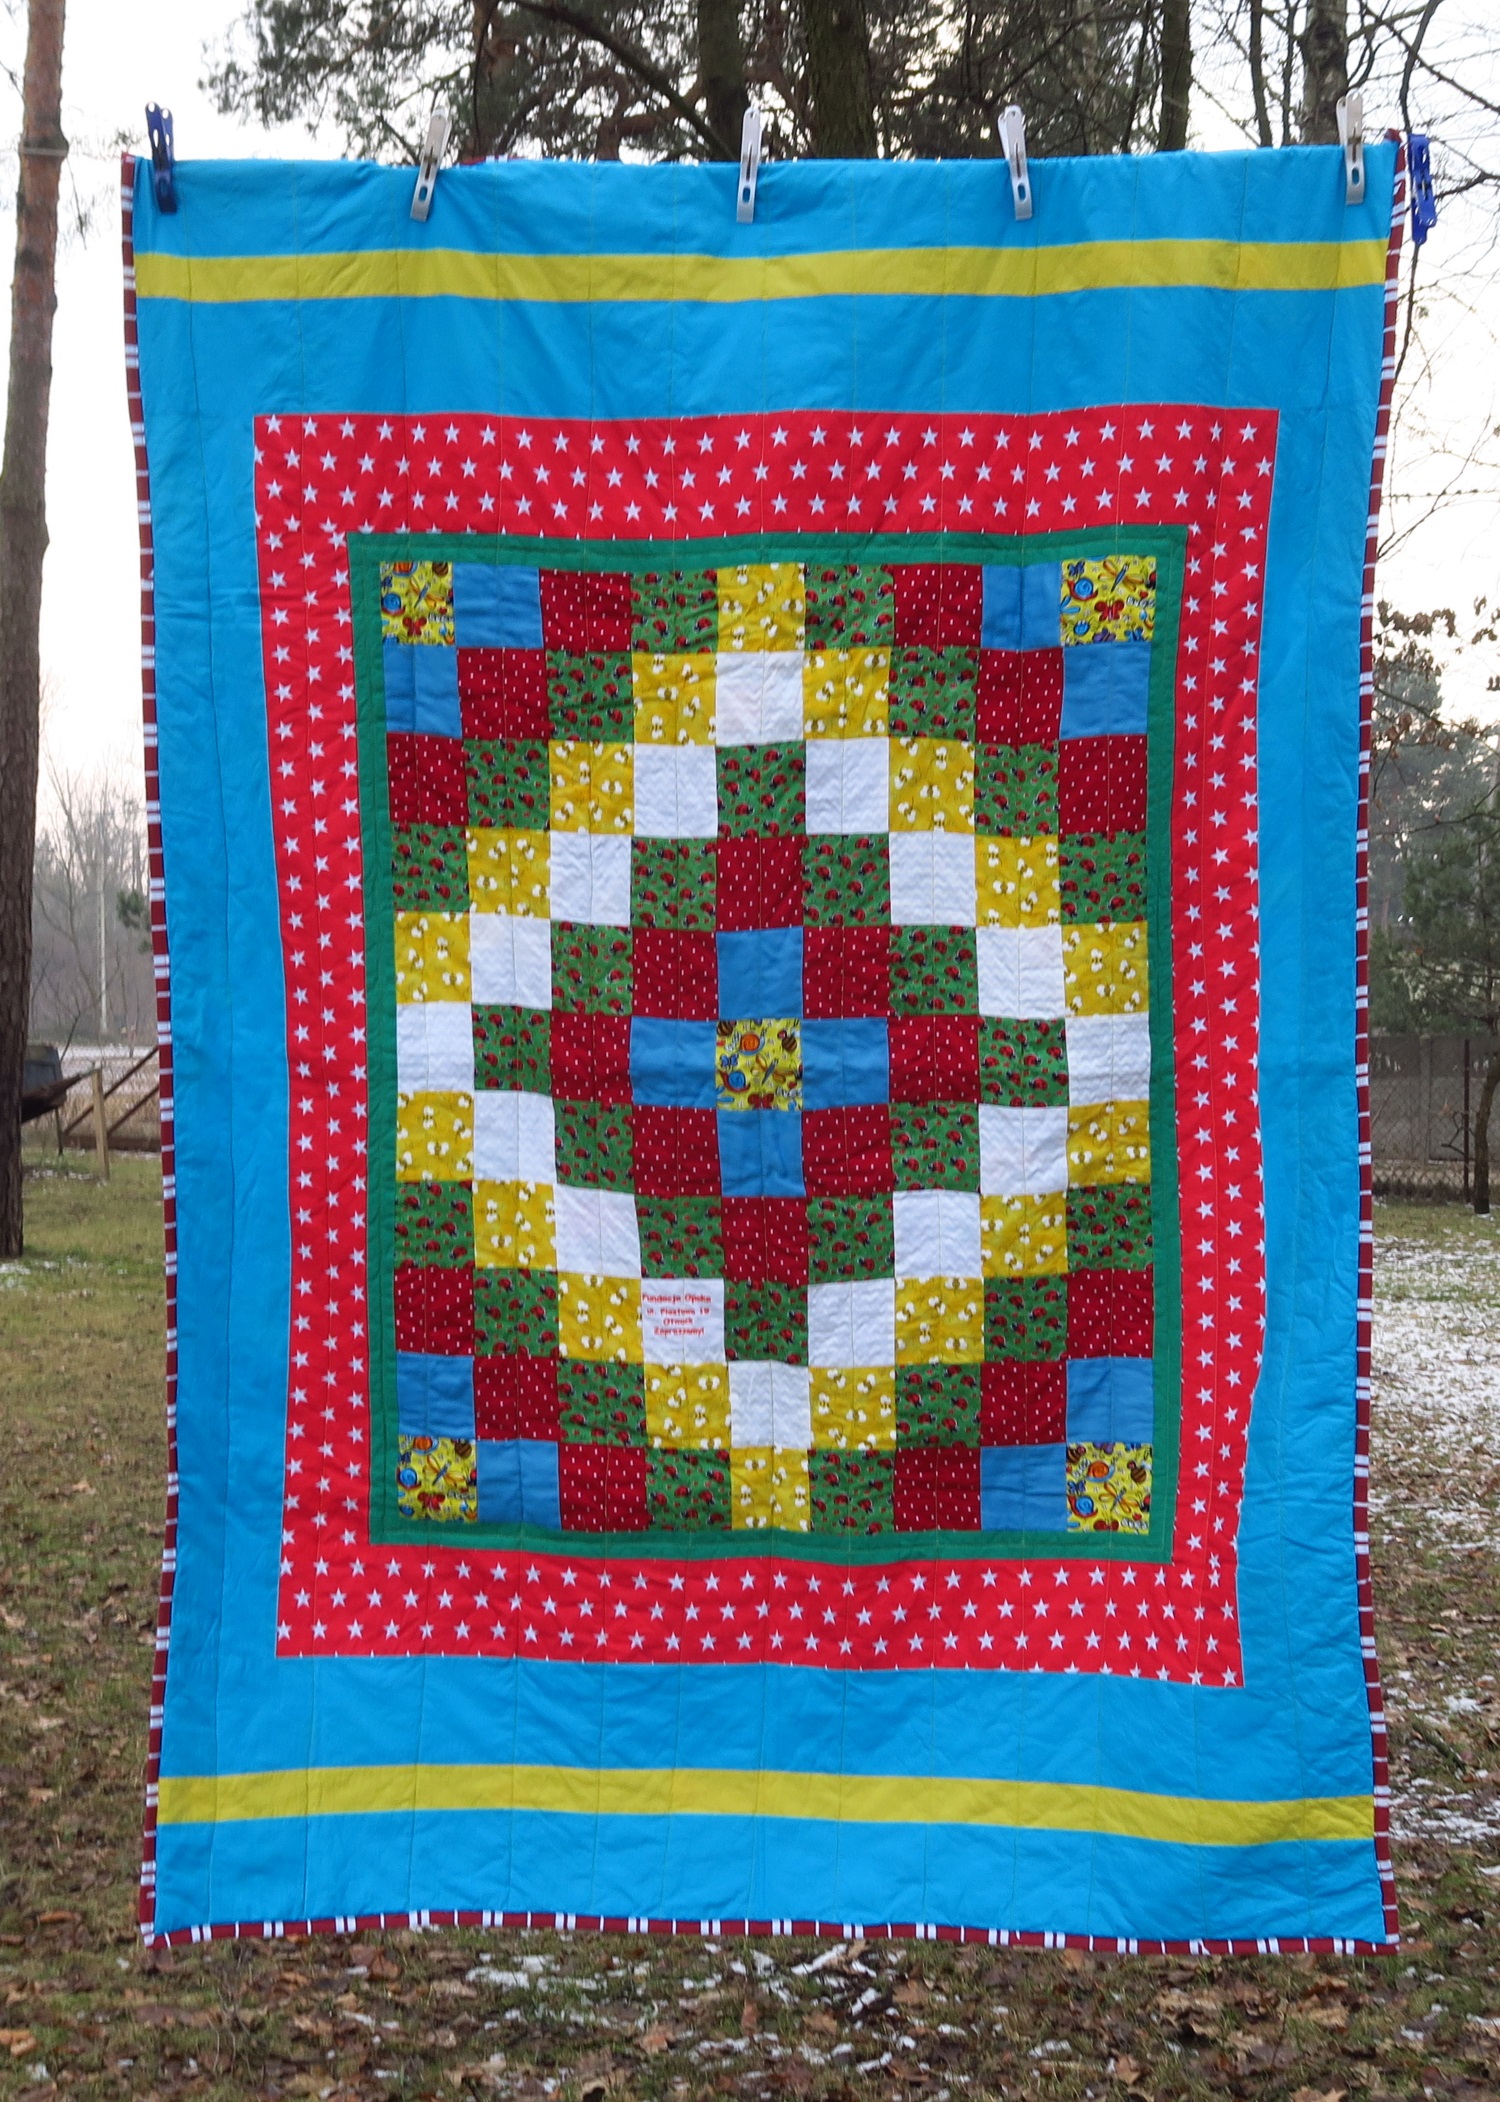
Charity Quilt idea 2 - using a panel or center pieced section
A couple of days ago I shared a different idea with you. about adding a piano key border to a simple panel to make a quick and inexpensive charity quilt.
Here’s another idea:
This is what I do with my little Around the World tips that my friend, Fran, sends me.
The layout looks like this:
The numbers shown indicate the size of the pieces I cut for this top - all of them are width of fabric (WOF).
This is how the quilt looks:
Fran uses cut 4.5” squares so theoretically, this center is 36”x 44”.
This is using a center piece that is 36”x 44” or close to it. The final top ends up being 59”x almost 80” which is exactly the size I like for a single (I aim for 55-62” wide). I am always okay with bigger than this, should you want to make me a top! That’s not really the point of this post though. But many of us do do charity quilts - and here’s an idea.
I put the numbers on the design shown above - but am not making a complete pattern for you since the center of your quilt may not be what mine is. Just cut the lengths of your strips to go with YOUR own center. Work from the center out - and just cut each round as you go.
This is the layout that I have been using most of the time and I like it - and so do our recipients. I can add a lot of color and fun borders! All I do is try to find coordinating fabrics. I’ve gotten where I’m adding wild fabrics!
You can see that I just did some straight line quilting on this one shown above.
Here is one I’m working on presently - a close up.
It’s the same layout as the one shown above.
Here are several I finished from last year - I do like this because the center will be on the top of the bed and the edges and the top/bottom will not be as visible. So, for the biggest “effect” while on the bed, this simple design “works”.
If you wanted to use this layout but make it smaller - maybe just a throw size — just leave off the final border/s.
So now you know!
Be sure to check out what my sis has for you in the store!.


Price is by the Yard.