Operation: Masks for NYC: Update and Step by Step on what I am doing.
A special treat by Rachael!
Calling all sewists!
If you can sew, then you can help!
I sent out this plea in my email a few days back to help our son in his ministry in NYC. He’s currently stuck in his apartment, but knows some policemen there, so I’m sure they’ll let him out to help get these distributed, when he has enough to do the job.
Several people responded. However, others responded wanting to know how to make them. So, I sent out a video of a man whipping them out on his amazingly speedy Juki. Of course, I didn’t understand anything said, if it was, because I had no sound on my computer. But, I could watch and listen.
Up until 3 days ago I was a part of those studying, reading and watching the mask making process with great intent. I had wanted to participate, but just preparing fabrics and orders was taking everything out of me.
So, finally, when someone asked, “Please write out what you do, step by step,” I thought, “Well, I guess I should make one, so that I can write it out!”
It looked fun. It certainly didn’t look hard, and I was determined to do it!
So, on Monday night, after we got a record number of cut orders out in the mail, after supper, I was determined to come back to the house and get ole Brother out and figure out how to make these. I was NOT going to stay there and chop more cotton!!!
I had been asking and reading and watching, and decided I’d do it like this:
1) No filter, but a place for a filter
2) Since speed was my friend, and I had little time, making as few seams as possible was important to me, so I decided to do a self-lining piece.
3) No elastic around here anywhere, so ties were my only option
So, before I left the office, where mats, rulers, cutters and all were easily had, I cut out several 14x8.5” or 14x9” (depends on what worked for my fabric), and brought them home. (If you have a true 45” wide fabric, you can get 2 cuts that are 9” and one that is 4.5”, but that’s rare, so I just cheated on a couple, making them 8.5” sometimes, and then that would leave the last one about 8 to 8.5” wide.

My friend “Brother” hadn’t been out of his case since Christmas time. Well, not really, Sandi Schempp had looked at him for me, so we could figure out why the needle wasn’t going down in the center of the presser foot, but off to the side. When she explained what to do to fix that problem, I was set and ready to go! (Any machine I’d worked on previously had always had the needle go down through the center of the presser foot.)
First thing I did was get out the iron and ironing board. I pressed my 14x9” pieces flat.

Then I pressed under approximately ¼” on each end of the 9” side. (It probably ended up being more like 3/8”, but who’s measuring? I sure wasn’t!) The name of my game was SPEED!)
Then I folded the mask in half and pressed it evenly so that it was nice and flat with the two ¼” pieces tucked under.

Taking it to the machine, I sewed in about 1.5”, backed up to anchor the stitches and brought the needle to within about 1.5” of the other end, back stitched and proceeded to the end. This gave me the pocket opening where a filter could be inserted.


Then I jumped back up to the ironing board and pressed in 3 pleats. I decided to opt for 2 pleats later on, because 2 was easier. And of course, after all, if we’re going to pump these in major production style, and if 2 is faster than 3, why all means, let’s do 2! I just folded them and pressed them. NOPE. I did not take pins and pin them down. I didn’t measure or anything like that. I had previously made a “guide” by using a part of a mail promotional that measured 3” to use as my guide, so I could fold it down to “about” the same size as the paper, like this:
Then I took the pressed mask to the machine. The first 3, I decided to stitch in place to keep the pleats where they needed to be. After that, I just winged it, and jumped to the next step.

Then I took a 2.5” strip that I had previously pressed flat, and putting right sides together, I stitched the center of the 2.5” strip (about 22.5” in) to the center of the 3” side on the mask.. (Of course, I’m just guessing, and not measuring, because, after all, who really cares?) I did fold the strip in half to get the center, and matched the center up with the approximate center on the mask. I did that to both sides of the mask.


Then I folded over the 2.5” strip and stitched it close. When I got to the mask, I made sure that it covered the stitching and made for a nice to stitching on the side I was watching. Surprisingly, when I flipped it over when I was done, it looked great! (I did tell you that I used to sew all the time, but put it away for like 25 years, right?)


Then, I went to do the other 2.5” strip. When finished, I ran a top stitch along the 4 ends of the ties. No, I didn’t zig zag it or turn it under or anything. I’m thinking that if they are annoyingly long for someone in NYC, they might just snip them off. I didn’t see any need to do any extra work that might later just be cut off!
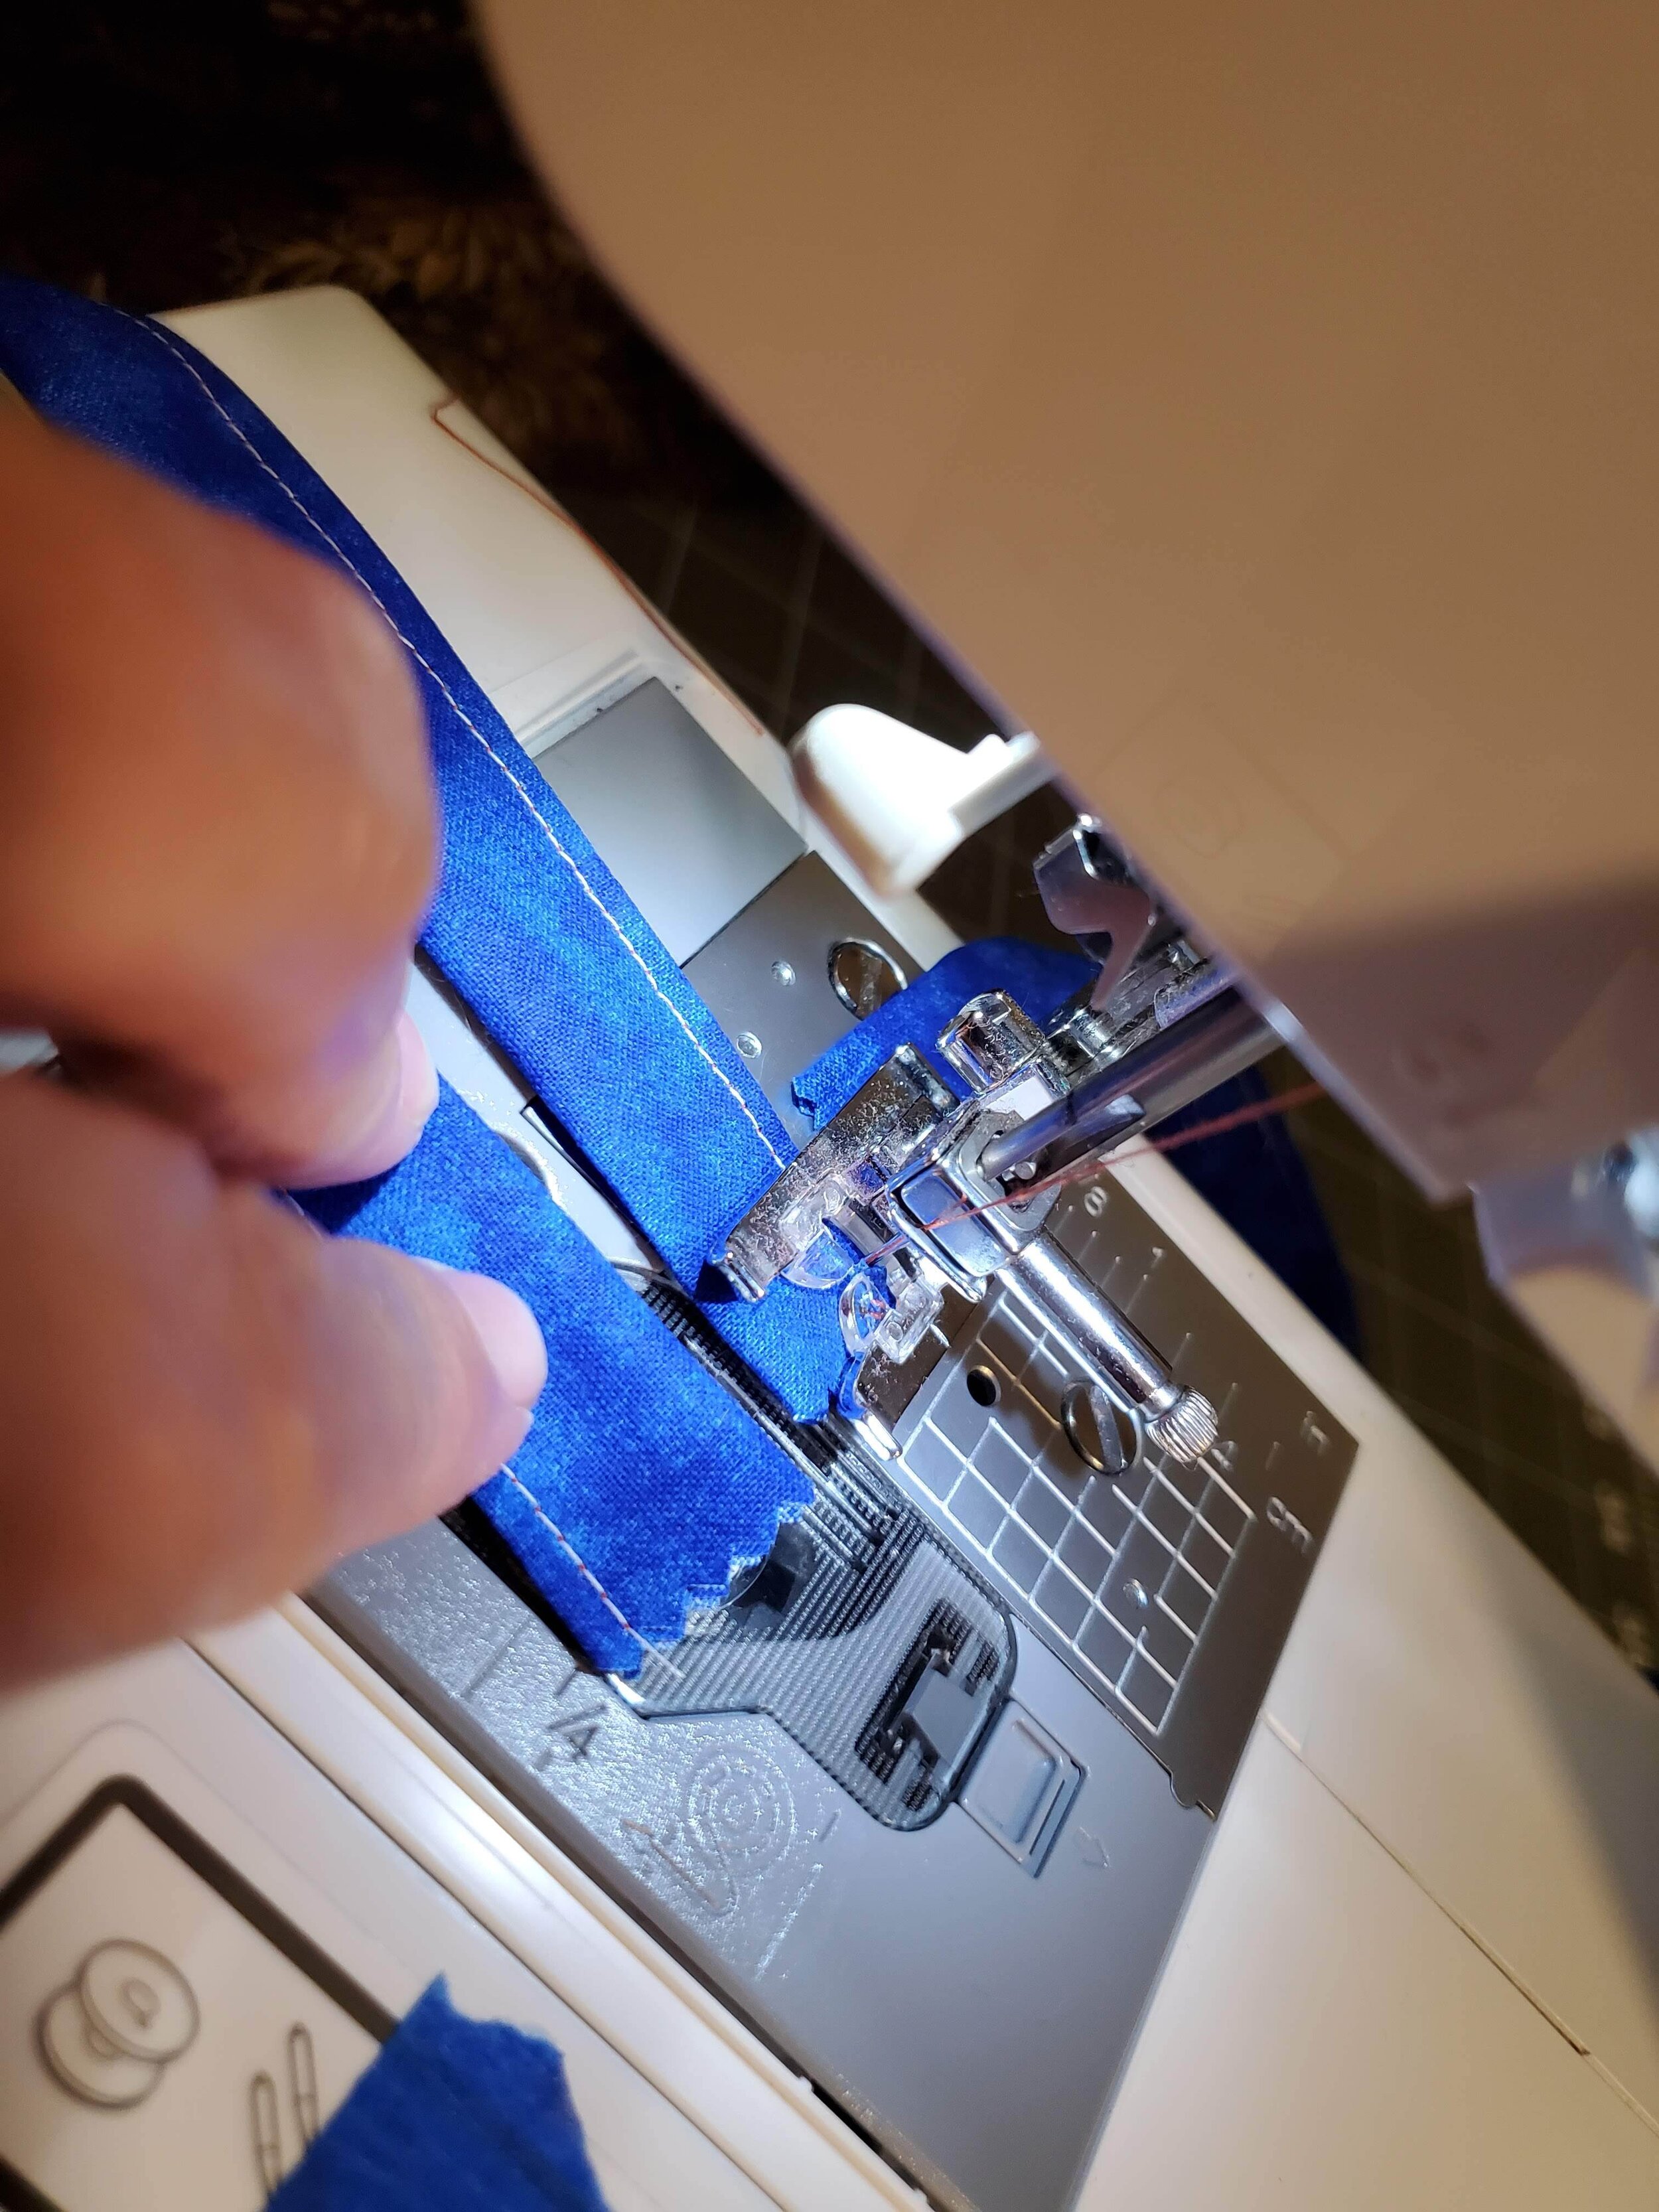
I just stitched across the zigzagged end.

When I was done, I was pretty pleased with these masks.
Then, last night (Wednesday), I took a couple over to my mom and let her pick one that she wanted. She needs one to wear to the store, as it’s been recommended by the CDC to wear them when you’re out!
So, there you have it.

Here’s our Mom.. the one who taught us both to sew!
The last 5 took about 15 minutes each, but that’s because I stopped to take so many pictures. I think I should be able to get the time down to about 7 minutes each under optimal conditions, if I can streamline them and work in an assembly line style. The last 3 I did, I think it was about 35 minutes for all 3, which was closer to my target time. Of course, I’m working with a “non professional machine’, but I found that my good ole Brother really does ramp up in speed, when I changed it to the 3 arrows on the front of the machine, instead of plodding along at 2. Can you tell this is a new machine to me? I’ve only used it a tiny bit. My old 70’s Singer quit working properly many years ago, and that discouraged me from sewing.
So, if you can help, we still need about 600 of these made for Andy in NYC.
If you can do some, please fill out the form that he created for us here. We’ll be gathering them and shipping them to him up there in NYC as soon as we can get a box full!
You are a wonderful group of caring people. If you’re close by, I’ll be happy to supply the fabric. If you want to use the sewin’ shop to make the 2.5” strips withe Accuquilt we have there (to cut), you’re welcome to do that, too!
Thanks so much for doing your part in helping curb this mess!
Be sure to check out what I have for you in the store!

Colors may vary slightly from what is portrayed. Screens vary as well as our eyes sometimes see things differently, but we've made every attempt to have the color be accurately portrayed.
Price is by the Yard.
100% cotton
41/43" wide
Local quilt shop quality fabric
Beautiful Moda branded fabric.
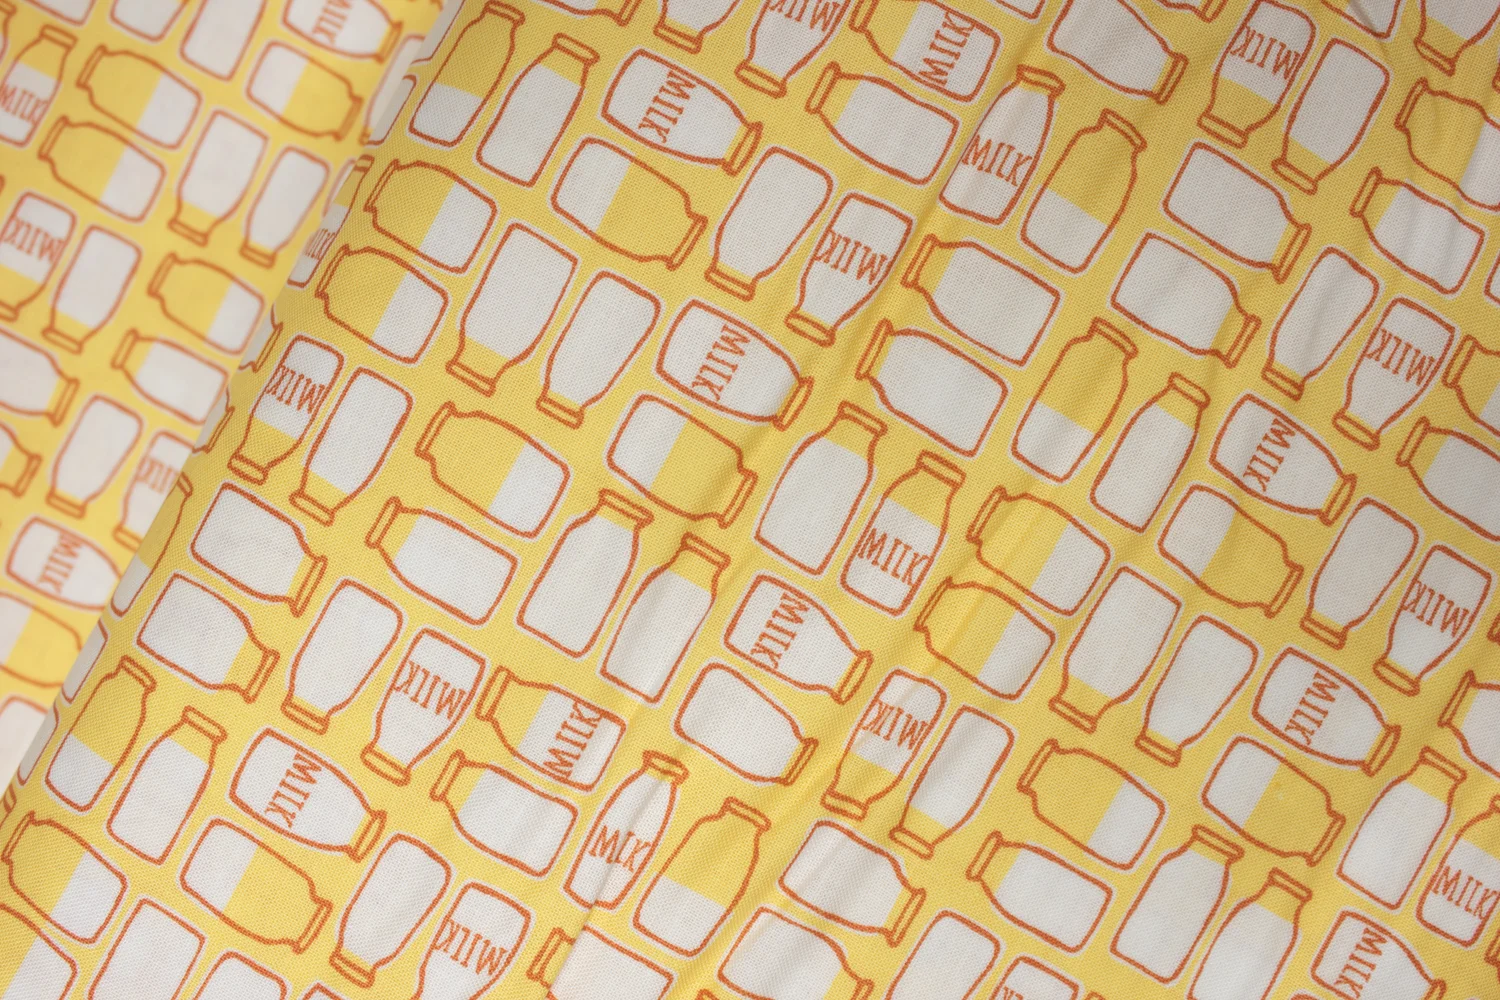
Farm Fun
by Stacy Islet Hsu
White Milk Bottles on Green