"Papa's Tractor" quilt top finished
I had noticed a specific tractor block in a book by Lori Holt--Farm Girl Vintage 2. You can buy this book from us at Quilted Twins, should you also like this.
I really liked the block and wanted to make it.
When I was younger, my dad often called himself a “farmer from Montana”. He loved tractors and eventually brought tractors from his place that he grew up in Montana to Florida. He had a green, a red and a yellow tractor for a total of three. In fact, on mom’s property, I believe all three tractors are still sitting there…growing older and older. :) Yes, we always had a garden - a BIG one.
Plus, my husband has a little red tractor here in Poland. I used it in some quilt pictures.
So, when I made this quilt, I made 12 blocks. I did some research and tried to find popular tractor colors with various combinations.
Surely probably all of them have black seats, but in the blocks you see below are a variety of seat colors. I wanted to make it more interesting than just plain black all the time.

The first four blocks I made
I realized I needed a sashing that also provided some white to give the tractors themselves space. I didn’t want the tractors actually butting up against the sashing with no space in between.
This top finishes at 56”x73” so it is a nice lap size. It will easily keep a body warm while he/she takes a nap.
Because the sashing is so wide, I decided to leave off outer borders.
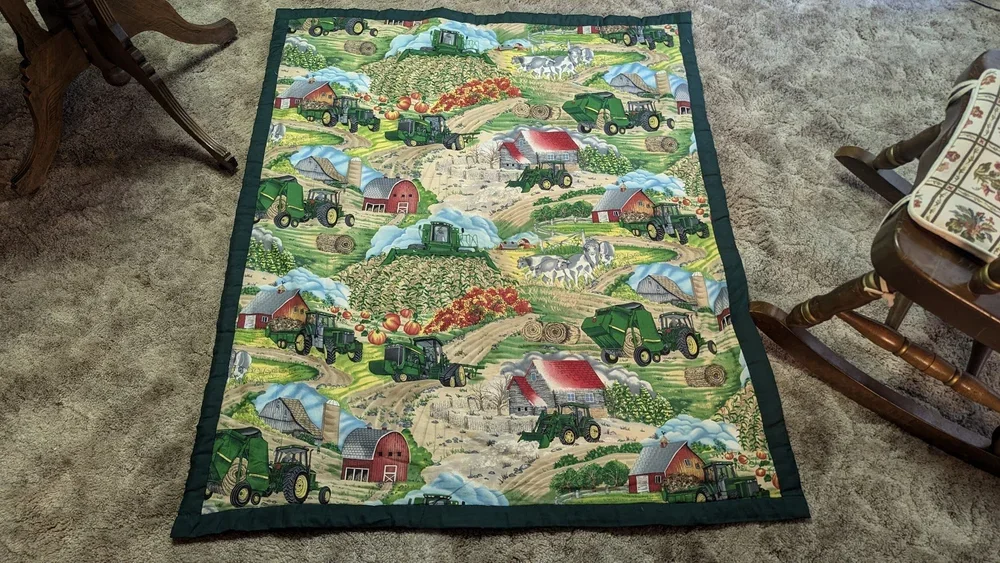
It was just going to be bigger than I wanted it to be. I wanted so much to use a certain fabric on the borders, but I think I will just use it on the backing. It is a village print with some tractors and farm scene. I think it will be nice on the back since I don’t make to make this top as big as it would need to be to use the fabric properly. In other words, I would not just put a 4” border - but I would want 6” so you could see the design. We have some in stock as of writing the blog post - it’s here and only $6.99/yard!

So I’ll just put it on the back. One my first actual quilts I made my dad was a yellow and green print - way before I knew really what I was doing - and I put an amazing John Deere scene on the back. Dad loved the back and always used it. In fact, it it still on the back of one of the chairs at mom’s house. I smile every time I see it.
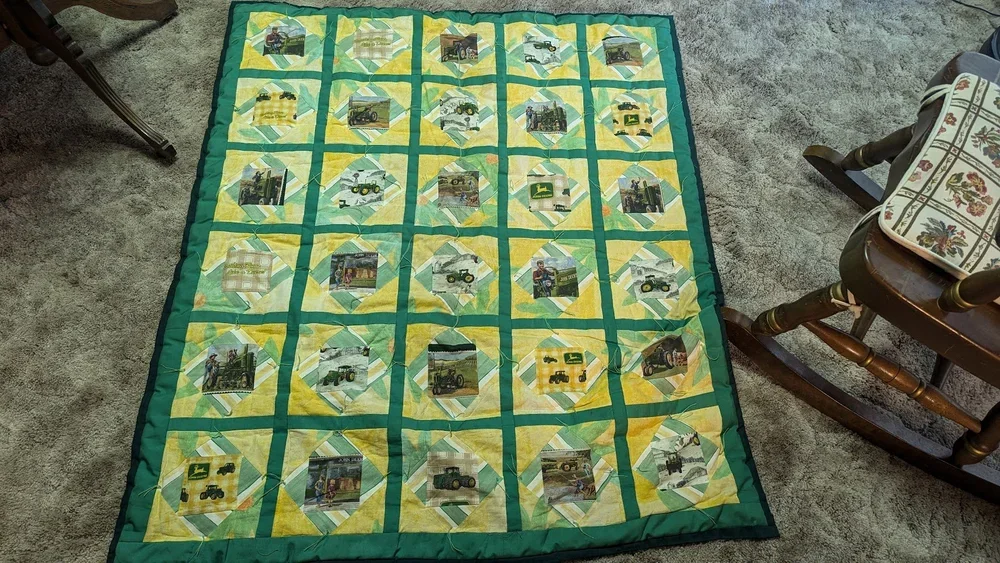
I did do some research as to different colors of tractors so I could try to make at least sort of authentically colored tractors. Besides John Deere which is green and yellow, and Case, which is red, and Ford or New Holland, which are blue - I learned that Kubota tractors are orange. I then found other color combinations that are interesting and allowed me to make every tractor in my top different.

After I get it quilted, I will be adding a button to the middle of the smaller tires - the button will be the same color as the back rims.

A bit closer up. No two of the tractors are exactly the same.

I reversed every other row when I made the tractors. In order to do this efficiently, I actually hung one of my finished blocks backwards so I could look at it while constructing the ones that faced right. This way I made 6 facing left and 6 facing right.

For the sashing blocks, I made a 5”x12” fail fence block with the center block cut 3.5”x12.5” and each side piece cut 1.5”x12.5”. When all sewn together it is 5.5”x12.5” and once sewn into the quilt is 5”x12”. The cornerstones were cut 3.5” square and I put 1.5” white strips around the center yellow block. I wanted to let you know that in case by any chance someone wanted to make something similar.
Thank you so much for coming along with me on this journey!
Oh wait - if you want some tractor fabric - check out these! We have them in the store!


Have a great day wherever you are reading this.
Be sure to check out what my sis has for you in the store here!
Feel free to browse the site.