Random Act 2 - top finished
I don’t really know how many of these there will be, but just for continuity I thought I’d go ahead and give it this title.

The top one on the right was a bit looser weave than the rest. On top of that, the seam lines made it so less was usable than the others. I hardly had any bigger pieces at all of it. The dark purple had probably 2-3"% spandex.
As I mentioned before in my blog post about Random Act continued, on my way to give the young lady the quilt I made from her father’s shirts, I stopped and picked up a few shirts from another lady who advertised on the group as a set of 5 shirts. This time, ladies’ shirts, though.
But when I opened the bag they were in once I got home, I fell in love. My reaction was actually opposite of what it had been with the other situation where the shirts themselves left me a little “cold” as they weren’t easy to work with. These were cotton or at least mostly cotton - the purple one has some spandex in it.
The part that left me almost reeling was the size. The lady is quite a small person and because the shirts were tailored, both with darts and then seams for shaping, I was left wondering what to do. The colors…well, I really like working with these colors! I loved the “feel” of the fabrics - they “snapped” like cotton!
Some of you want to know how my brain thinks and how I come up with the ideas on what to do. Let me share with you here how it went on this day.

I knew I had would have to add to the shirts - there simply wasn’t enough to make a quilt out of the fabric. After separating the shirts into pieces, and looking at one of the backs, I measured it after taking the darts out (yes, I did that - unsewed the darts so I’d have a nice flat piece of fabric)…it was still only about a fat quarter size - about 18”x22”. Let’s say, at best, I had 5 of those - that’s only 1.25 yards. Then I had sleeves and fronts, yokes and collars. But each shirt had pockets which left less on the fronts.
I also knew that I wanted a light, airy feel. The shirts were very feminine - the lady herself seems to fit with the shirts and if I had plans to give the finished quilt to her, in effect, returning her shirts, in a different form, I wanted to make something I thought she might like. It is all a guess, though - as I don’t really know her! (But I think you realize that!)
The other quandary I had was because the pieces themselves weren’t big, I couldn’t cut big squares from them. Obviously if I made big squares, things would go much faster than if I used small ones.
But I couldn’t get many big squares from the fabric - at least one of the shirts had pieces that really weren’t very wide at all as they were a princess seam style of shirt. I had to balance what happens when you make a quilt with smaller pieces (more seams means you need more fabric) with the idea that I couldn’t get many bigger squares (even 4” cut) out of these shirts. If I had chosen to use bigger pieces, there would be a lot of unusable fabric left sitting on the table.
SO…I just went with what I thought. I cut those shirts into 2.5” strips. I cut 1.5” white strips to be used as sashing and decided to just make it as big as I could. I’d stop when I ran out of fabric. I left some of the larger pieces whole until I used up the smaller pieces to get an idea of how much I had left.
I had planned from the beginning to make a piano key border from anything that was too small to cut into a 2.5” strip. I just wasn’t sure how long those keys could be!
And so that is what I did. I know that sometimes I think that I overuse piano key borders, but I find that for such type of quilts, they are a real solution to using up the odd bits in an organized way.

It was kind of a miracle that I had enough for the binding. I had made the squares that I needed and after cutting up about 240 squares (I was strip piecing), I put the unused strips into a bag for the binding.
It was enough to get the job done with about 10” extra. (I’ve already finished the quilt.)
I think that was the Lord’s hand. I really don’t know any other answer other than that. I didn’t plan it - I just cut those squares, - actually I strip pieced - 2.5” colored strips to 1.5” white strips and then cut off 2.5” segments until I thought maybe I had enough. The first time I didn’t have enough cut so I cut and sewed more. Then I came back to EQ and saw that 240 - which is what I counted I had - was enough with a couple leftover for a nice sized lap quilt. I shoved the rest of the unused strips into that plastic bag to be pulled out later as binding. (I use 2.5” strips for binding.) To be honest, I had thought about using something else for binding if I didn’t have enough - I would have found a different piece, or used white.
I still had some random pieces that I had hoped to cut up into the piano key border. When it was all said and done, and I had the piano key border on, I measured all those 2.5” strips I had stuffed into that plastic bag and until that time, I didn’t know if I was going to have enough for the binding. I had figured to add white to them to make it enough. But, I laid them out, measured, and figured that I thought I probably had enough without adding white. Yes, it was. I sewed them together and measured again before I attached to the quilt.
When I finished binding, I had about a 10” strip left over!
I believe I did a pretty good job at using it all up. Well, there are a few very small pieces in my sewing room as I type that I could continue to piece together to make “created fabric” but I think I’m going to declare myself finished.

I could not use the pockets. The strips for the piano key border ended up only 3.5” wide and the pockets, while small, were bigger than 3” across and 3” down. So for my corner pieces in the piano key border, I did make 4 crumb blocks from various pieces as I had no more pieces big enough to cut a 3.5”x3.5” square for the corners.
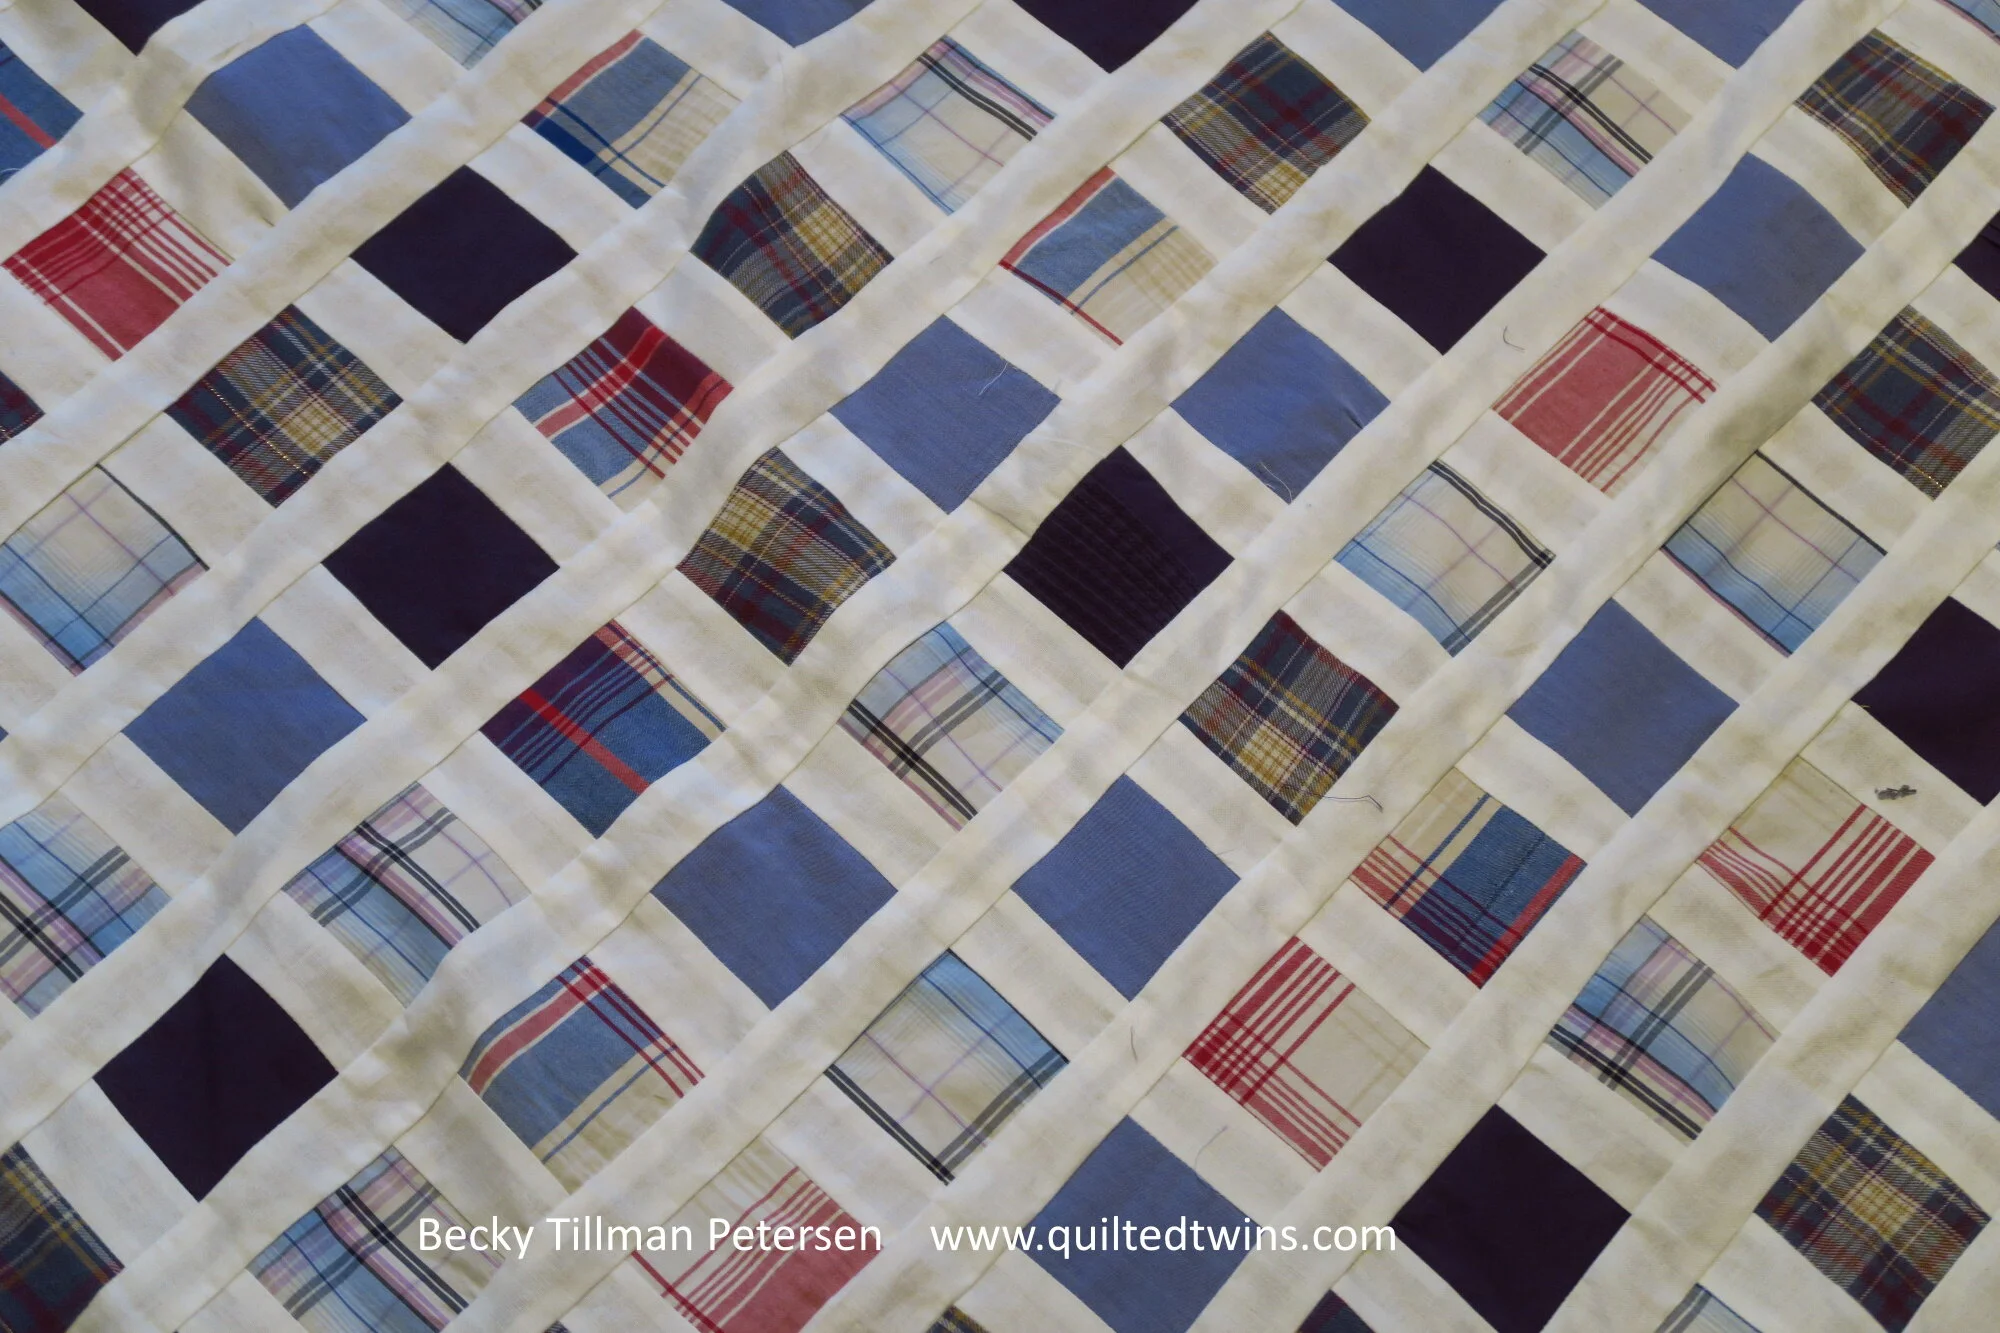
Here’s the top.

I know it looks like I’m going to have problems here because of some of the seemingly extra fabric and the fact that it isn’t lying flat as well as it could. Part of that is the bias nature of the on point layout with small blocks. I also measured through the center of the quilt to get the measurements for the sides so that I’d not have wavy borders - at least at attempt to not have them. That meant that there is some easing of the sides of the quilt into the first border.
I’m working on the pattern and when I finish the story with the delivery and picture of the finished quilt, I’ll have the pattern ready. I am not sure how many people actually want to make such a thing, but it is easily adaptable to any size block.
The only thing that makes this pattern different from any such random on-point-with-sashing-scrap-quilt is how I made the squares float in the center of the design. I also put a 1” (finished) piece around to frame the center. I originally was thinking half inch - yes, 0.5”, but decided that working with 1” strips of some of the fabric might be asking for trouble - esp. since I was piecing it together and that looser weave fabric might present problems for me. So I left them at 1.5” (cut) wide.
The beauty of using poly batting is that it is a bit puffy and seems to absorb that extra fabric and space no problem—especially when I do some sort of circular quilting.
Here’s where I’m sandwiching it - you can see how it looks all laid out on the table.

As of this post writing, I’m all finished with the quilt - something I’m not usually doing when only showing the top, but am not going to show it as a finished quilt until after I give it away.
I will say that I’m seriously “in love” with it. If I didn’t have two rooms full of quilts, I’d be terribly tempted to keep it.
So…stay tuned for the next part of this story. I’m not sure when it will be, but I’m hoping BEFORE Christmas.
Have a great day wherever you are reading this!
Be sure to check out what my sis has for you in the store!


Colors may vary slightly from what is portrayed. Screens vary as well as our eyes sometimes see things differently, but we've made every attempt to have the color be accurately portrayed.
Price is by the Yard.
100% cotton
41/43" wide
Local quilt shop quality fabric
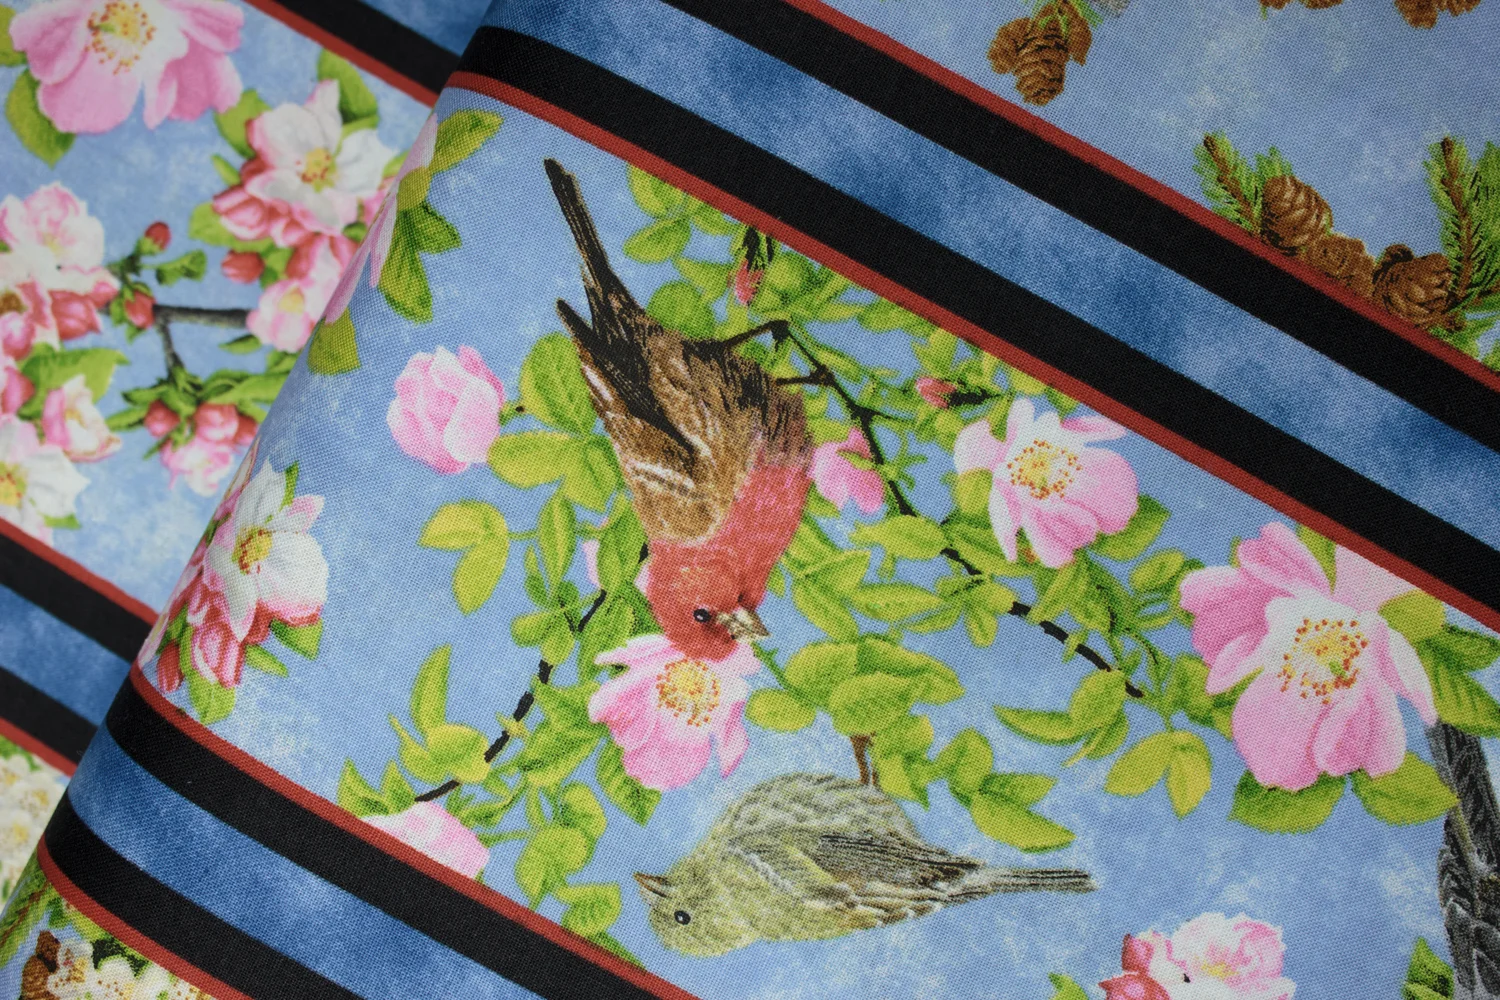
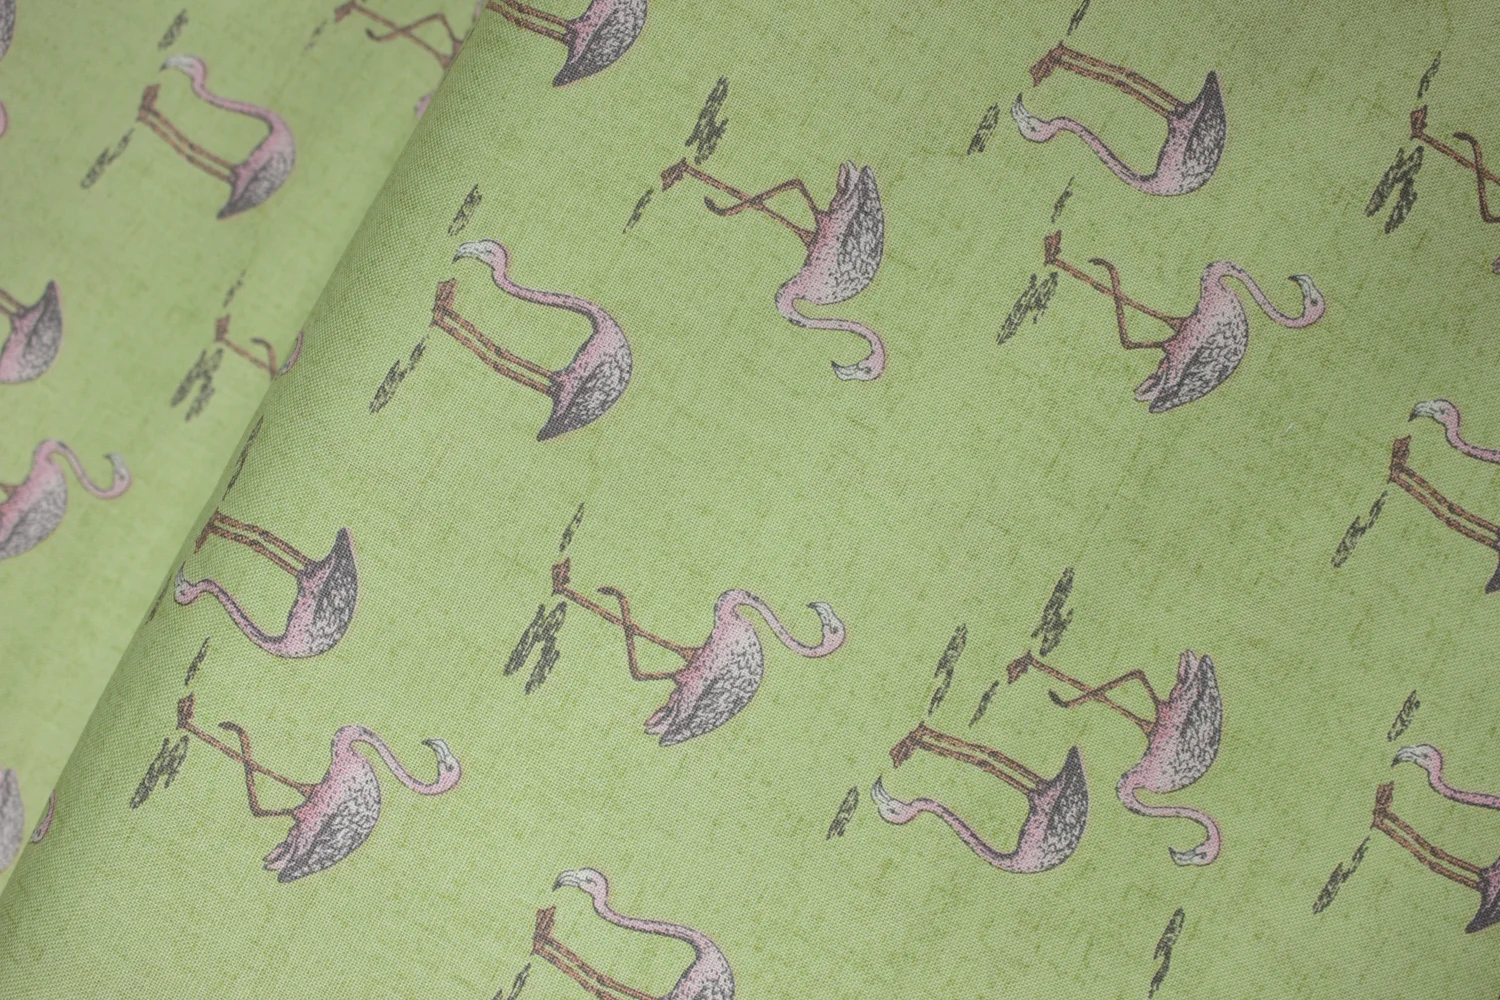
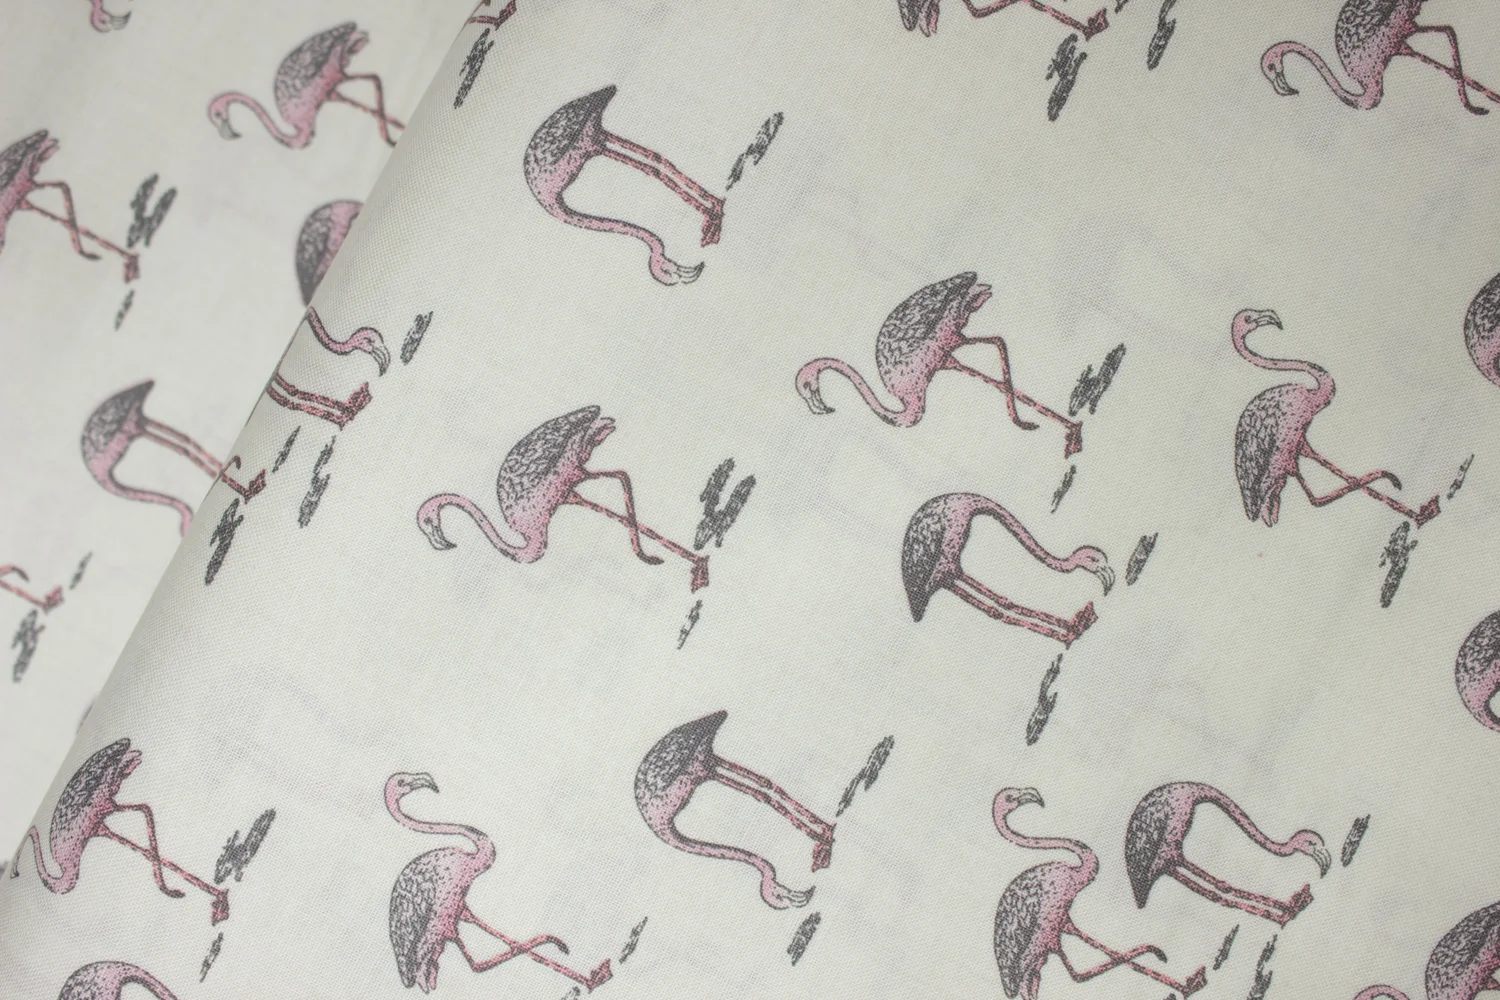
Swan Feathers
By Quilting Treasures
White swan feathers on colored background.
Goes with the Splendid Swans panel here: https://www.quiltedtwins.com/panels/example-product-r7hrs-jpw6n-47cts-685bb-8nlhb-5j47l-haasx-7a6rr-6zm5k-7eyjd-22a4m?rq=splendid%20swans