How I make those Quilted Hearts

Some of you know that I’ve started making quilted hearts to put in various places.
I had actually started making them in early 2020. However, before I had a chance to put any out, everything got shut down. So I officially restarted this a couple of months ago now.
It’s a “random act of kindness” type of thing that many are doing all over the world.
I am sure there are many ways to make quilted hearts - but recently someone wrote me on Facebook and asked how I make them.
Since there is really not any right/wrong way to do it, I thought I’d just go through and describe how I make mine.
As part of the Facebook group I joined pertaining to quilted hearts, I had someone ask if I cut batting into heart shapes before I quilt the heart. I realized at that point (a few days ago now) that it might be a good idea to show you how I do these.
These are great fun to make when I’m at the end of my day and I’m kind of tired of making my actual quilt or project that I’m working on. I suppose I think of them a little like filler items.
But they are so fun! I’m just enjoying practicing some new things like basic beading and being able to add lace and other decorations. Since I’m not actually making many household items or clothing right now, it is a great way to get that itch scratched.
I have had a pile of miscellaneous novelty prints that I recently uncovered (yes, in that whole room purge thing - though purge is too strong of a word). I decided rather than try to make something for charity out of them - since they are so unrelated to each other, I would use them for these hearts. They are totally random, and as I mentioned - novelty. I had made my children’s memory quilts with these 6 or 6.5” squares - as I had purchased and collected these fabrics as I came across from them as possibilities for them.

My younger daughter’s memory quilt - she took it to college

My youngest son’s memory quilt
Their memory quilts were simple sashed squares that meant something to them.
I’ve been taking photos of each my hearts for many reasons. Mostly, it is for me - to remember what I’ve done. I also like to look back and remember that “Yes, this is something I can do” should I get into a rut with these.
Here are all of the ones I’ve done so far.


First I take a piece of fabric - and find something that coordinates with it for the backing. I usually have something not too far away that will work. Remember - this is me - Becky - I am not a picky backing person!!! This applies for these hearts as well. I figure most people aren’t looking at both sides at the same time.
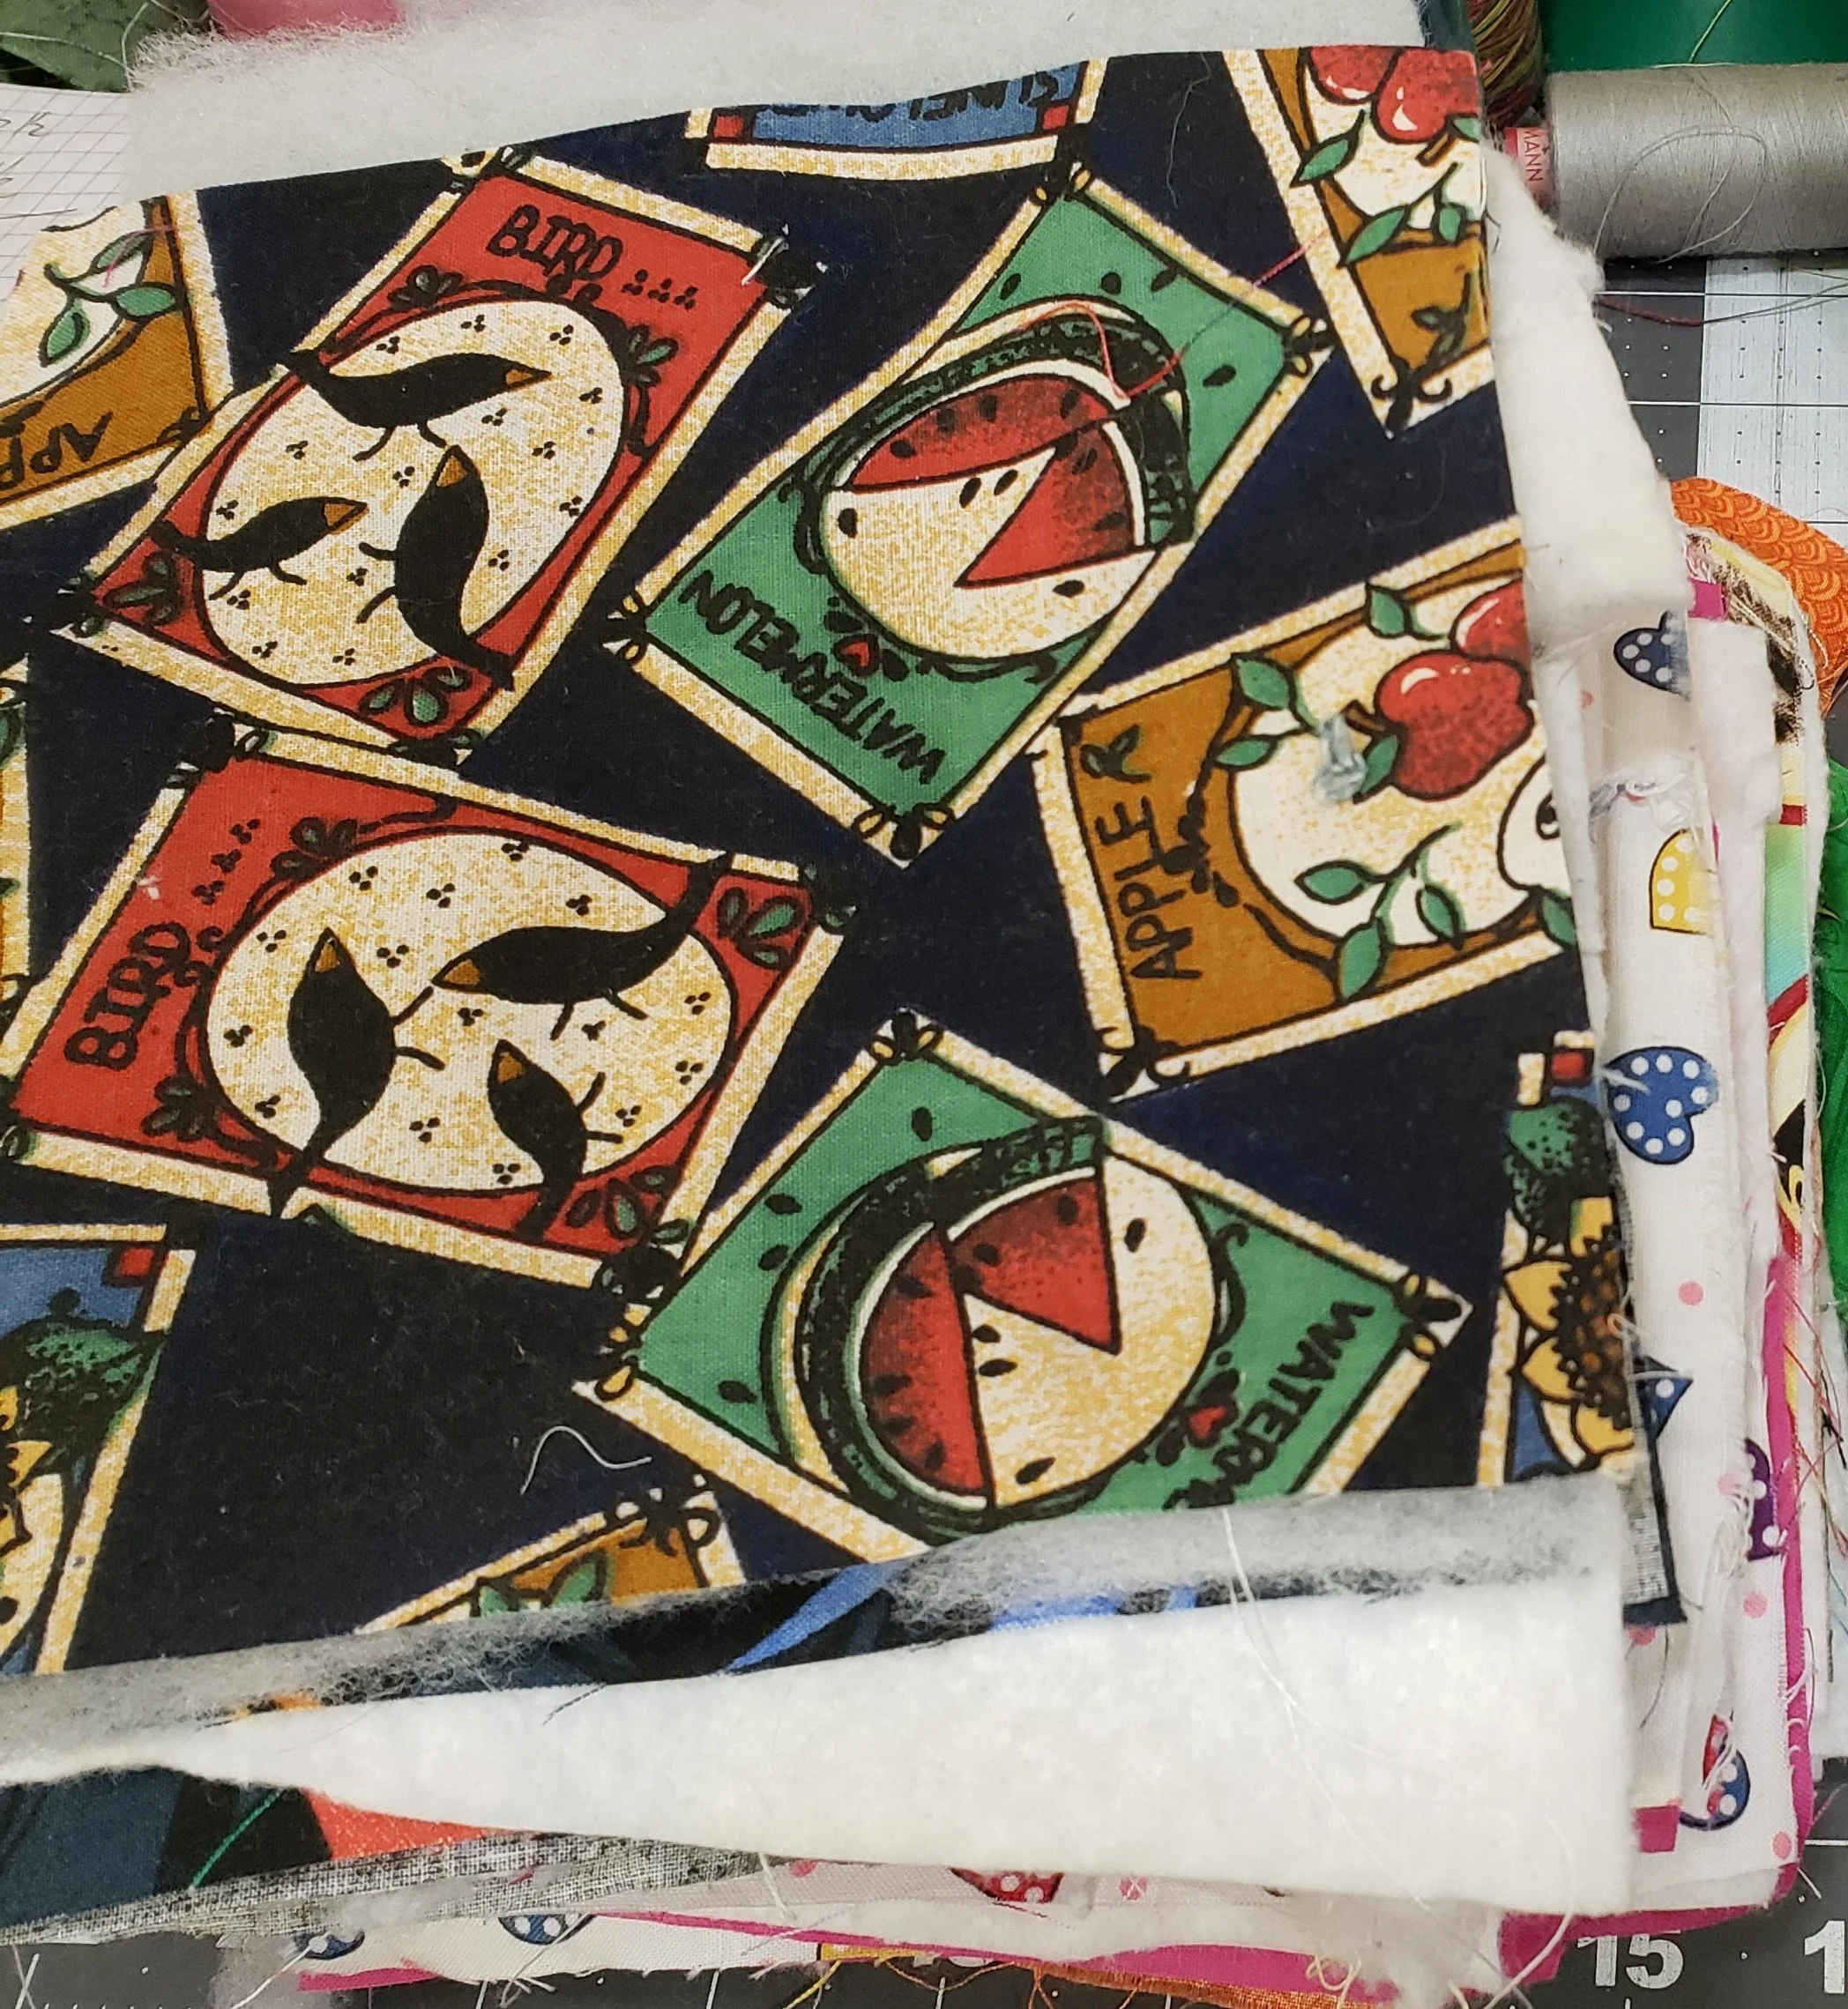
I then cut out a piece of batting that is sort of the same size and make a little sandwich. I do this over and over and make a stack of tops, batting and backs.
Then I start quilting. I’ve been using the walking foot and just random straight line quilting them. (There are so many ways to do this but so far this is how I’ve been using these simple squares.)

I chain piece/quilt until I get them all quilted. (I eyeball it. If you are a perfectionist, then making these hearts might stress you out! I’m not, so I’m having fun!)


Then I trim these quilted squares a bit.

Then I fold the squares in half and cut into a heart shape just like I used to do as a child when making paper hearts. It’s all just freehand - so called “winging it”. I asked my husband to take photos of my cutting the heart. This is a lot easier if I’m using the thinner batting. Thicker batting sometimes leaves me a messy point underneath where I have to be more careful.
Thin batting works great.


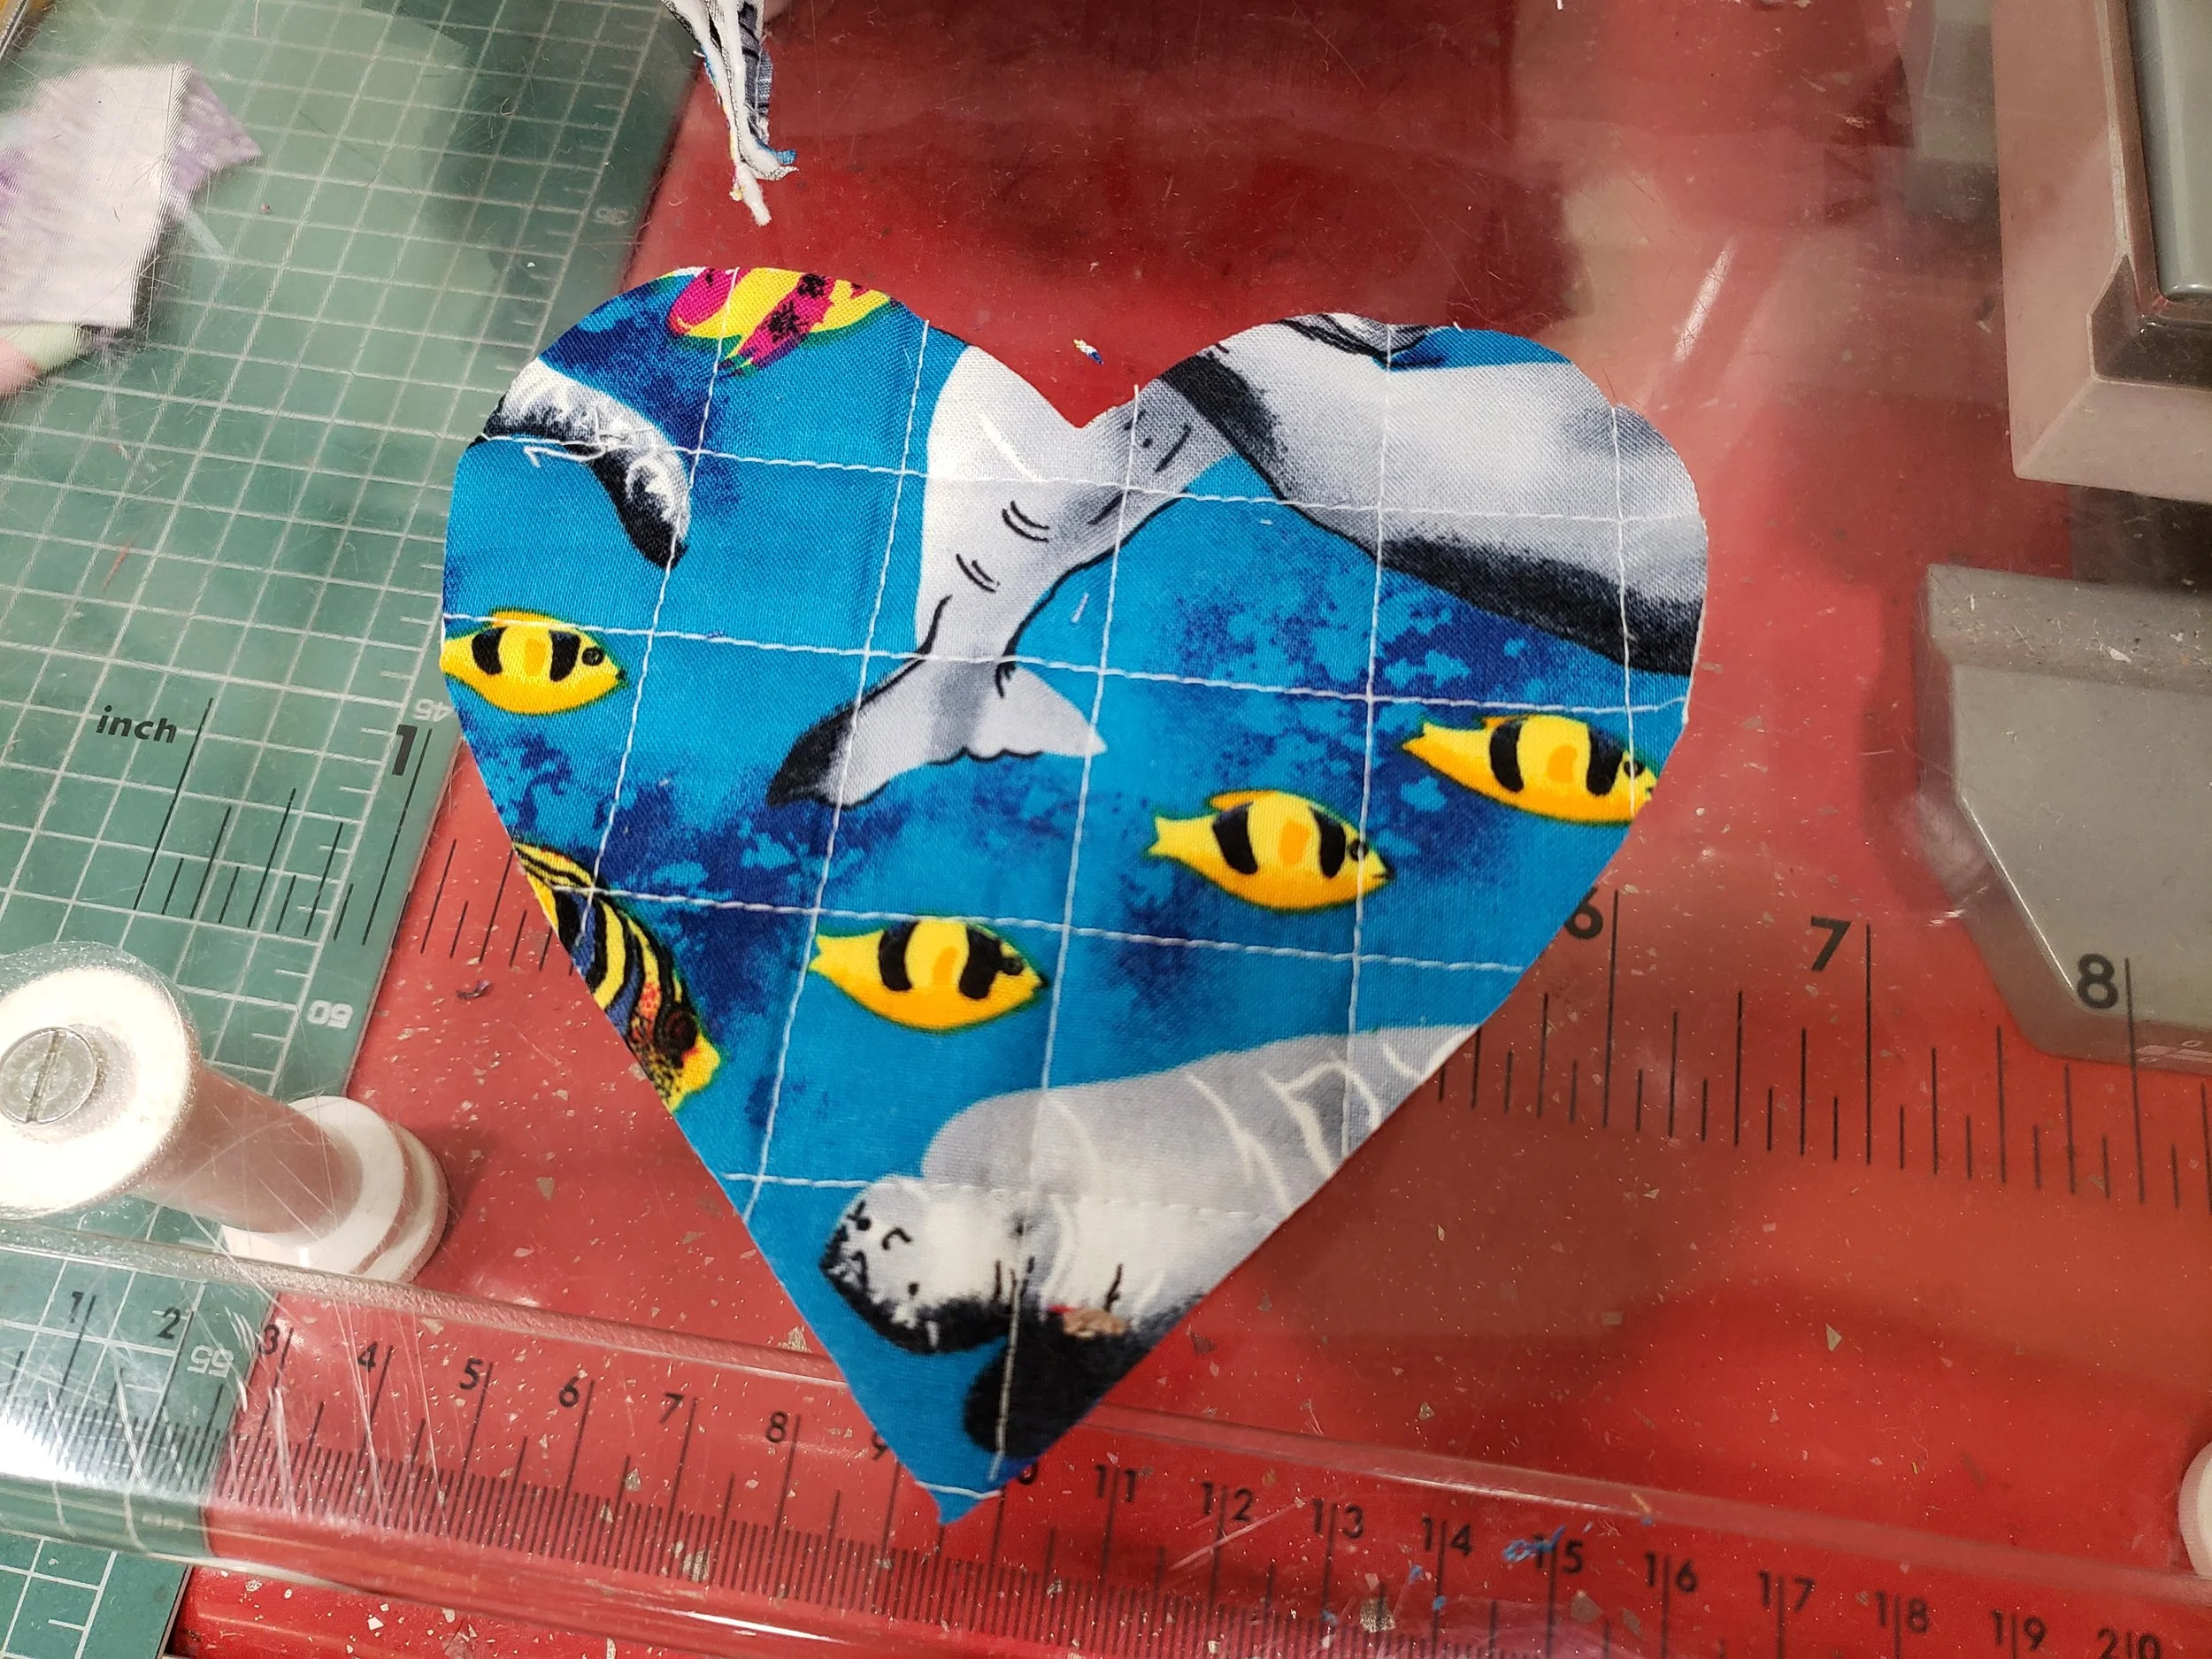
I use my super nice Kai shears for doing this as it really helps to have a nice pair of sharp scissors.

After I get the heart shapes, then the fun begins. It is time to decorate.
You can finish the edge if you want or leave it. I’ve done several things from simply stitching near the edge and leaving it, to using an applique overedge stitch on the machine to a nearby straight stitch and then pinking the edge. So far I decided I liked the look of a nice pinked edge with a new pair of very sharp pinking shears - Kai of course - and a line of stitching nearby.


I will admit - I am guilty - I made these pink/white green hearts to match the gorgeous lace I bought just to try to make some hearts! :) I did have to dig through my strips and scraps a bit (meaning I looked for a couple of minutes) to find colors that would look nice with the lace. I think I bought a yard or a meter of it so I have enough to make more.


Then I decide what to do - use a string loop, a lace or ribbon loop (or no loop at all if you want), various laces, trims, beads, buttons and start sewing.
I’ll admit I’ve been perusing You Tube videos of paper crafters to help me learn how to get a layered look (like many use for their journals). It has helped expand my own creativity and ideas on how to decorate these. I’m amazed at how beautiful people make journals and cards - which is something I’ve not really tried to do.


Anyway, for attaching things, mostly I sew, but I’ve also used glue. Just use a permanent glue.

After I finish decorating, then it is time to attach the label. You can write it out yourself or get a pdf from the ifaqh.com website and print it out and then cut it out.
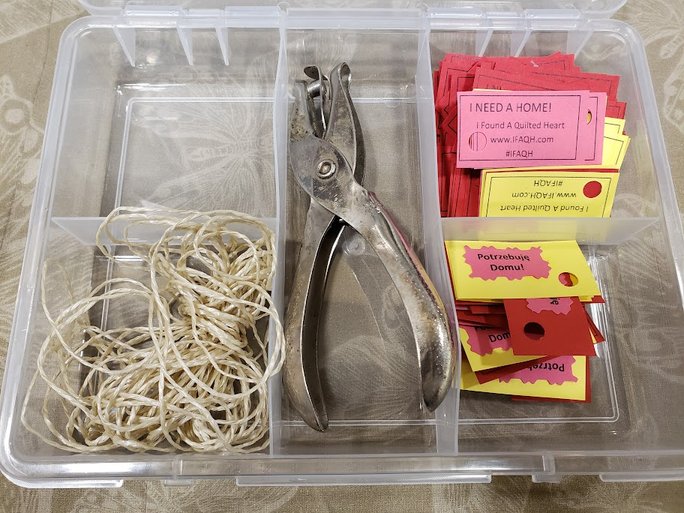
I am starting to put “Potrzebuje domu” on the backs of the label in a contrasting color. That means “I need a home” in Polish.
I just punch a hole in the little tag and use twine and put it on the heart through the loop. Some people safety pin the label to the heart. I’ve also seen them sewn on (I did that to a couple).

And now it’s time to go find a place to put it so it can be found!
I wrote this blog post so I can show people that it is ONE way to make these.
There are so many ways to make these hearts - really, one’s imagination is the limit!
And now you know!
Thanks so much for coming along with me on this journey!
Have a great day wherever you are reading this.
Be sure to check out what my sis has for you in the store here!
Feel free to browse the site.